• This forum is the machine-generated translation of www.cad3d.it/forum1 - the Italian design community. Several terms are not translated correctly.

revit, phases of work, manage stratigraphy

maubrando

Guest
Good evening to all,
I would like to know how to manage the plaster in the working phases of a restructuring. After creating the model and setting the filters and phases I would like to understand how to manage the demolition of the plaster only (e.g. in phase: week 4) and the new plaster (e.g. in stage:week 5). I realized the model using the base wall with the relative management of the stratigraphy. I don't want to handle the plaster by duplicating the wall type.

Thank you.
 
to date revit does not manage the stages on the individual stratigraphies.
and however it is not the function of the phases to be used as a sort a diagram of gantt.
if you want to manage inq uesto so the stratigraphies, you have to make walls of the thickness of the plaster that join those behind "stutturali" for the management of the holes (hiking that the elemnti dilibreria windows etc were made using the solids of subtraction and not the openings).
considers that after a while all the steps are messed up and management becomes confused
 
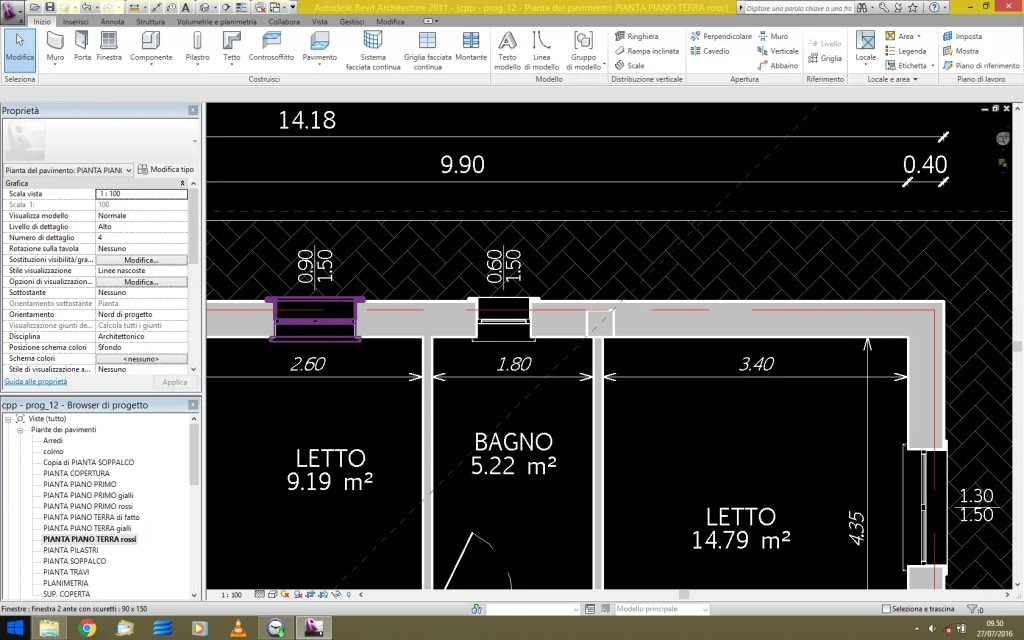
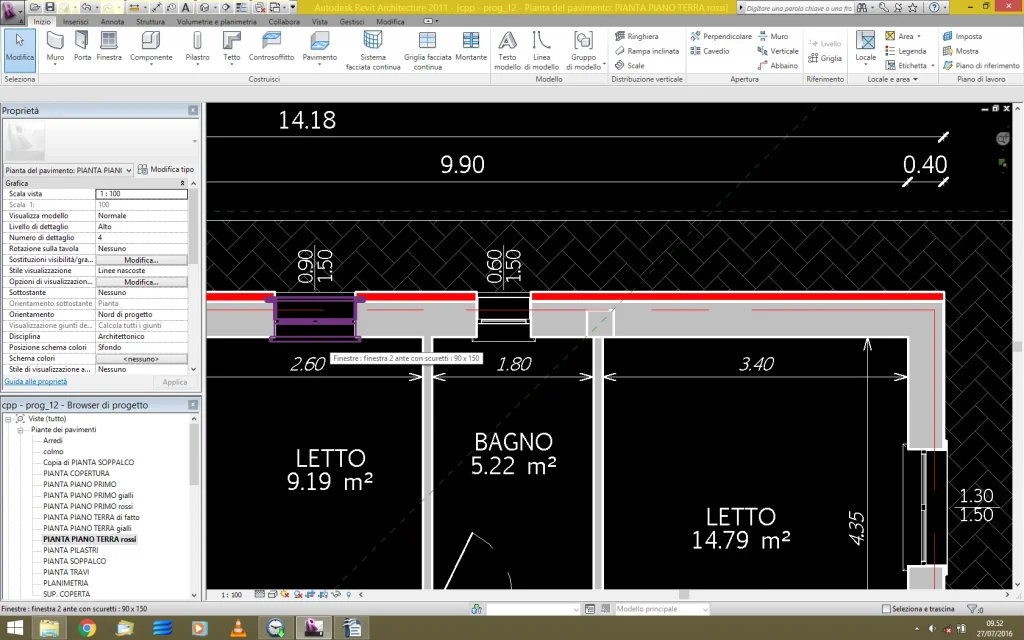
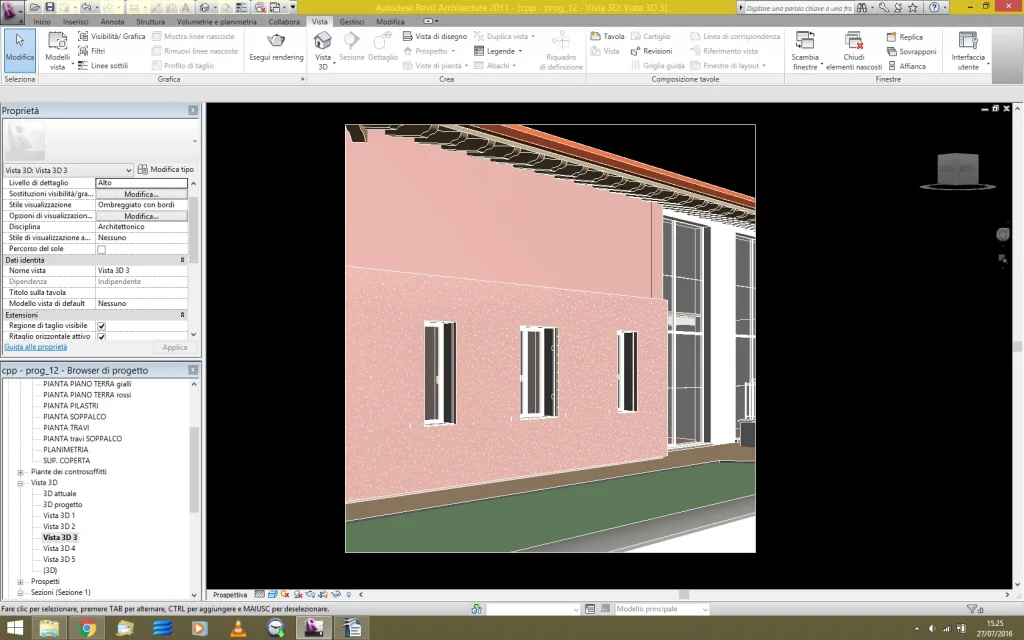
I attack here, although the problem is also raised in other discussion (window on two walls united). I have to do the classic renovation where I put the insulating coat on existing wall. here the windows do not adapt to the new union of the two walls (existing wall + "muro coat"). the problem is that I imposed the rvt file with the steps and therefore I can not create even a wall with coat colored in red. Does anyone have any ideas? stato attuale.webpstato progetto.webp Good summer
 
That's right.
I try to answer you with a question: how does the builder do?
simple: remove the threshold, remove the Persian (if there is Persian), put the coat, put the new threshold, reposition the Persian!
In the same way it has to make revit! so the window you are using is not good! you have two possibilities:
the first (the simplest and most brutal) demolishes the window and reposition on the wall+throat; The whole new window works, but in this case you will find the whole window in red and yellow;
the second most fine and correct is to demolish the threshold, demolish the Persian (if it exists) and reposition them in the new phase. everything proceeds correctly and also in comparison everything is correct.
In fact, however, to proceed in this way you must "disappear" the window in several families separated to fit properly, that is: the only window, the only window, the only window, the only persian.
Now it's been a long time since I use this method: my family is no longer a unique thing (window, Persian, internal threshold, external threshold), but I have several separate families (four or more depending on cases).
It's true that you make yourself "more track" to insert a "simple window" (four families instead of one), but with time you will find that the thing is much more versatile and you take off of hanging later (for example if I only have to replace the shutters - or replace them with the shutters - my window remains unchanged and I don't have different families of windows - with persian, without a single sister, with stage.
 
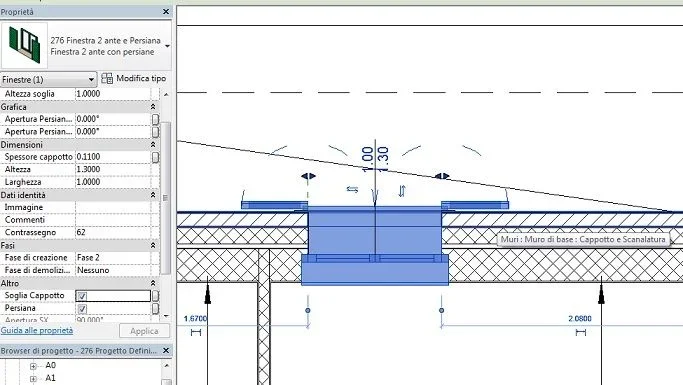
[MENTION=9930]sadan[/MENTION]The question [MENTION=47696]Preben[/MENTION] According to me it was on why the threshold and the shutters do not fit the empty wall+cap. in the image is the void between the walls united
 
The walls are united. the window (also inserted new and official library) does not fit the widest wall. I remember that we are in a model built with the stages of work. I would not want it to be as fabio.revit says that the family window is to be managed with the solid hole of subtraction! ! !
 
Then I don't understand. from the images it seems that the hole is correct, while the window has not adjusted the only threshold. However system windows do not use vacuum to make "hole", but the "open" command. the opening does not allow the management of the gaps between the walls united, while the vacuum is, with the only shortness that the vacuum (in the family window) is not bound to the profile of the external wall, but is "longed" beyond the wall
 
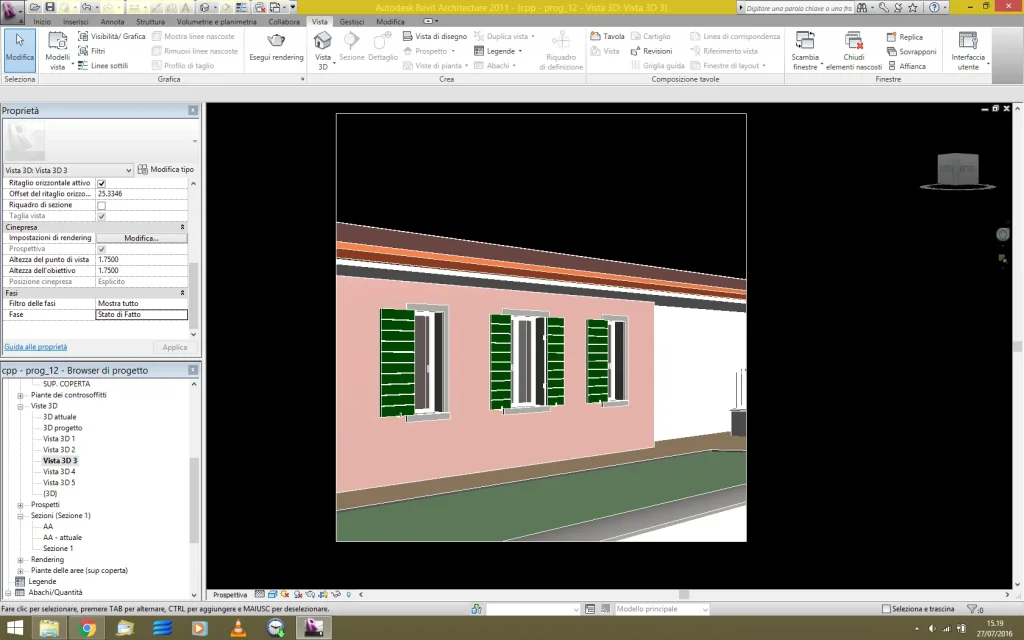
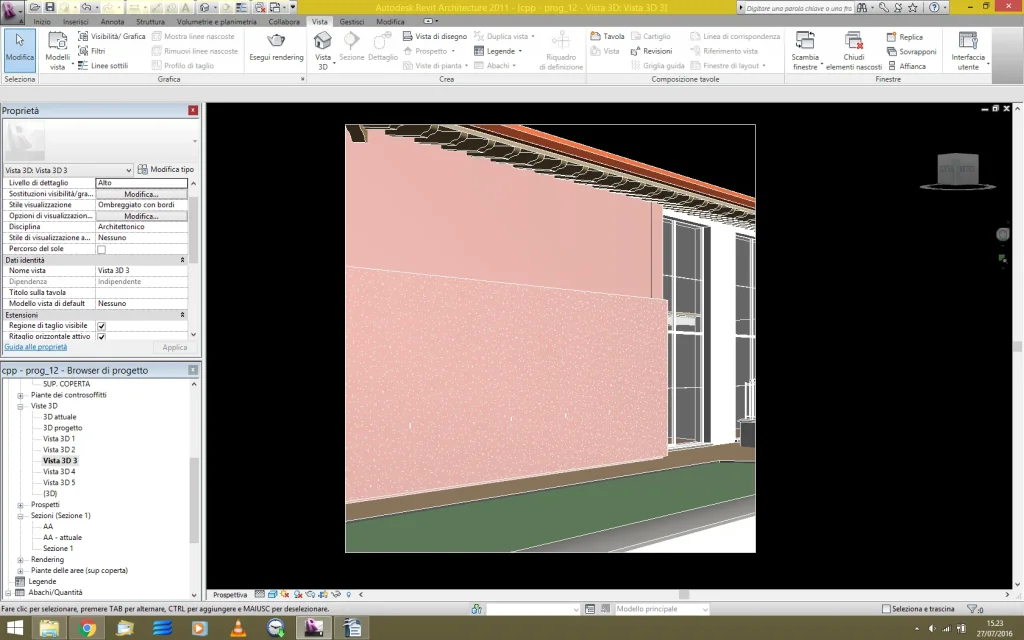
I'll show you. keep in mind that there is an elevation keeping the same windows and outer coat. the window as it pierces the wall but the frame and the shields remain bound by the outer wire of the existing wall (plant was gray) also joining it with the coat. by inserting an ex novo window does not calculate the double wall.vista attuale.webpvista progetto senza unione muri.webpvista progetto con unione muri.webp
 
as possible:manual cito - the first (the simplest and most brutal) demolishes the window and the reposition on the wall+piece; the whole new window fits into the wall + cap union.
I don't understand.
 
[MENTION=47696]Preben[/MENTION]: actually you're right I wrote a "fly." It's not possible! the only way is to proceed with point 2, or redefine the window with the position of the shields and the depth of the threshold given by a parameter (often coat for example). in my first projects I had done so: I regulated the position of the dark and the depth of the threshold according to a "thick coat" parameter that I operated with a flag yes/no. I apologize for the incorrect indication, but I remembered this procedure.
so the only one is to take the lock family back and adapt it to your needsFinestra.webp
 
remake the same family with the coat parameter so you can expand it at will? ! ok, provided I am pro revit all my life, but duplicate all the families of windows and doors windows and other forometrics seems exaggerated. Aren't we wrong? :confused:
 
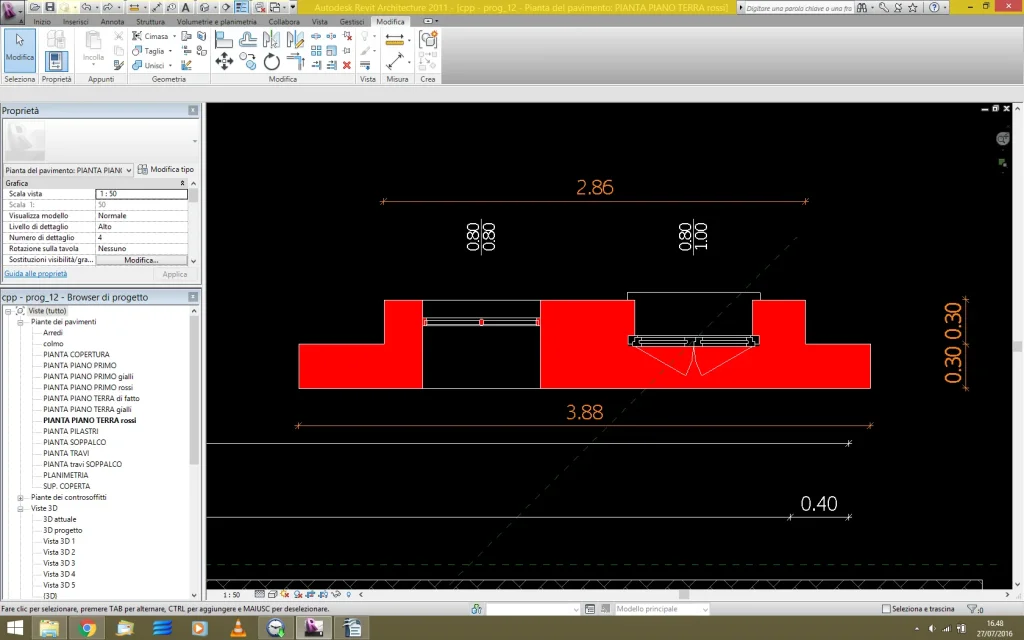
ma adesso guard qui: stesso wall of 30cm affiancato and Unit on which I inserted two families of bookshelf rvt:confronto.webp
 
a little at a time...it doesn't make sense in my opinion to put everything right away; do according to the needs of the moment and once it is made ;)
- - - updated - - - -one is made with a vacuum (right), the other with an opening (left)
 
Unfortunately with revit there is the risk of wanting the "everything in one" and therefore the will of a single family window with the possibility to choose between the only mirroring lock, together with the double mirroring one, etc., with the dark full the one to the Piedmontese, etc., with the all-in-one flagella all-round, half bull, etc., with the round handle, squared, etc.
Unfortunately so is a "macello", that time you need a little more different is a "casino" manage it. I, indeed, have come to the maximum (for me) with the creation of separate families or families of only locks, of sun thresholds, of only dark ones, of only "empty under window", bands, etc.
it is more slender to have to insert several times an element (minimum 4 steps per window -serramento+scuro+davanzale interno+davanzale esterno), but more versatile later (also according to the needs of the customer). It's just enough to have the kindness to lock everything up for good.
This way you are sure you have all the possible combinations according to your use.
If you think, in the end, families are not so many (see possibly that window and window door can be the same family) and however some families (for example thresholds and bandages) can be used for other needs (ports of the authorities? )
 
quoti [MENTION=9930]sadan[/MENTION]... for both answers: the two windows were made with different "empty" elements: opening and empty. only with the saying that the one realized with the "empty" has the bond of the void (in fact) to the face of the wall (it would be necessary to change the extrusion).
[MENTION=47696]Preben[/MENTION] It's not about going through all the families... but create from 0 your family (according to your needs)
 
definitely a little at a time!
is there a reason why the hole is made with "solid vacuum" and "opening"? Perhaps with the "empty solid" system can I adjust its size and create niches?
thanks for the clarifications

the families I gave birth to them according to the needs and the fact that it did not adapt to overlapping walls I escaped, I also screwed from the last image you see.
 
opening is easier to achieve but less versatile; will always be and only a hole in the shape of parallelepiped.
with the subtraction solid you decide the real form, but of course things get complicated especially if you have to parameterize this vacuum.
 

Forum statistics

Threads
44,997
Messages
339,767
Members
4
Latest member
ibt

Members online

No members online now.
Back
Top