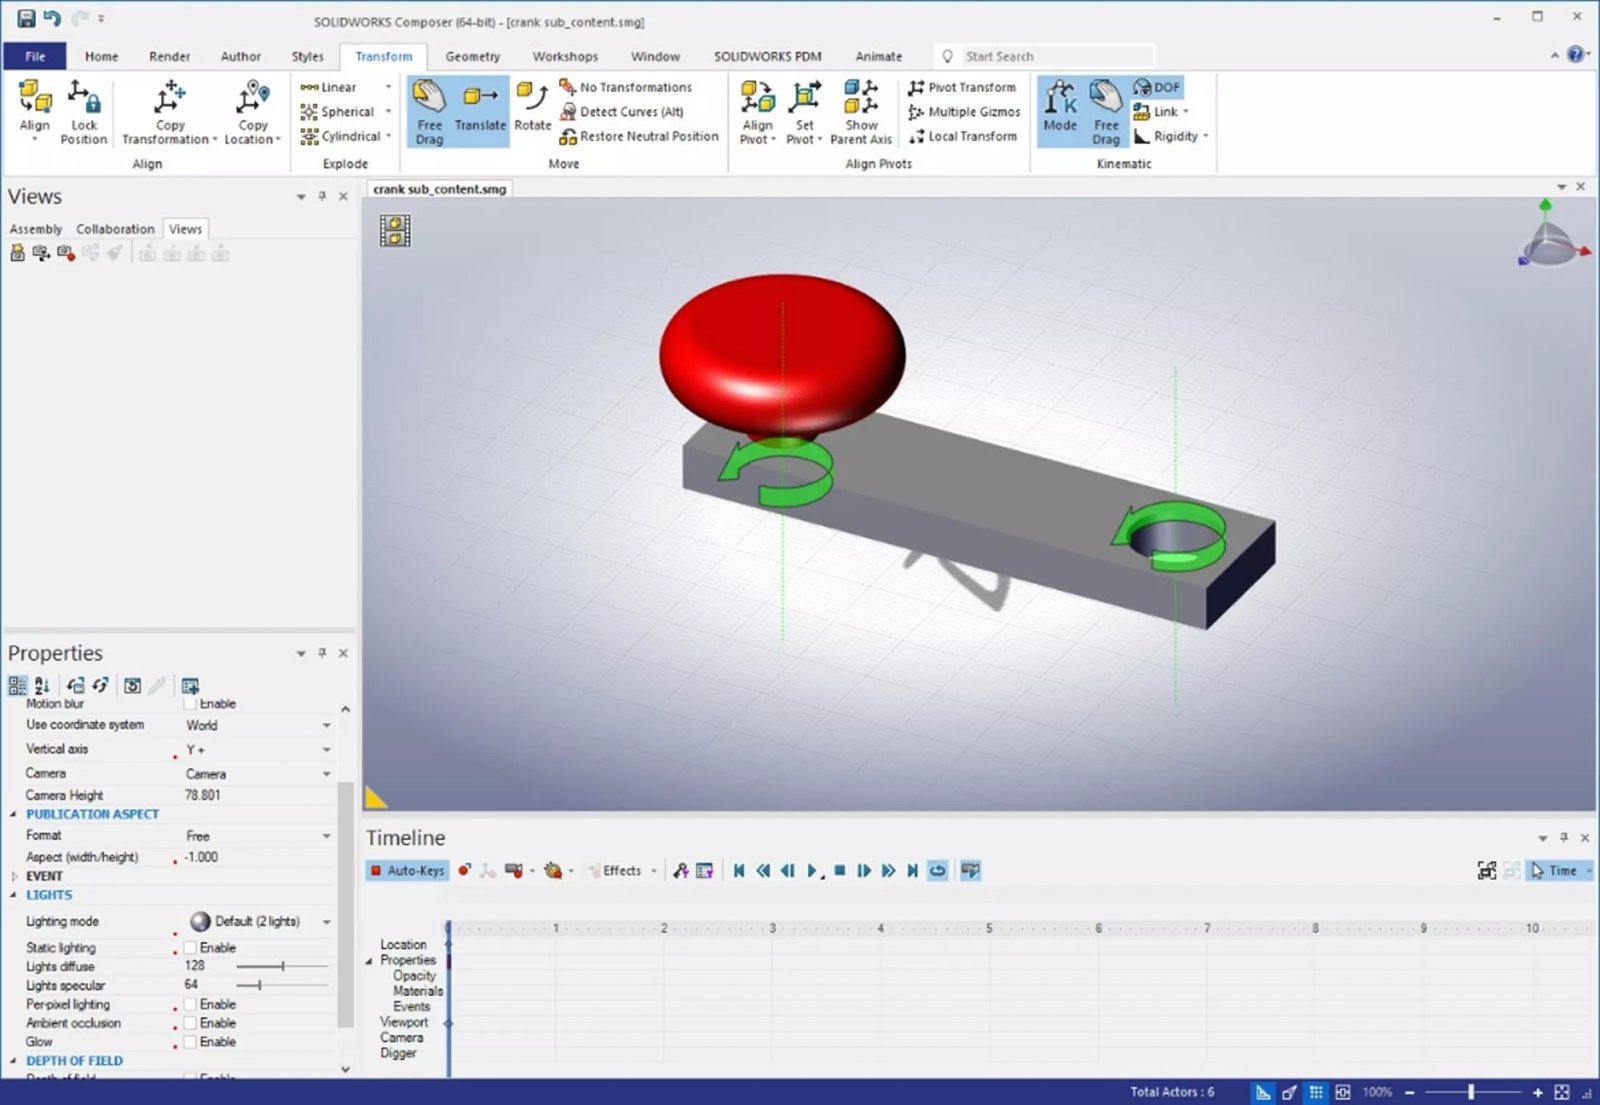
In SOLIDWORKS Composer, users can set up actors to constrain motion in a project. Doing so lets us specify the ways in which specific actors can move, effectively limiting their degrees of freedom. This controlled motion is similar to how mates can be used in SOLIDWORKS assemblies to do the same.
How to Set Up Actors in SOLIDWORKS Composer
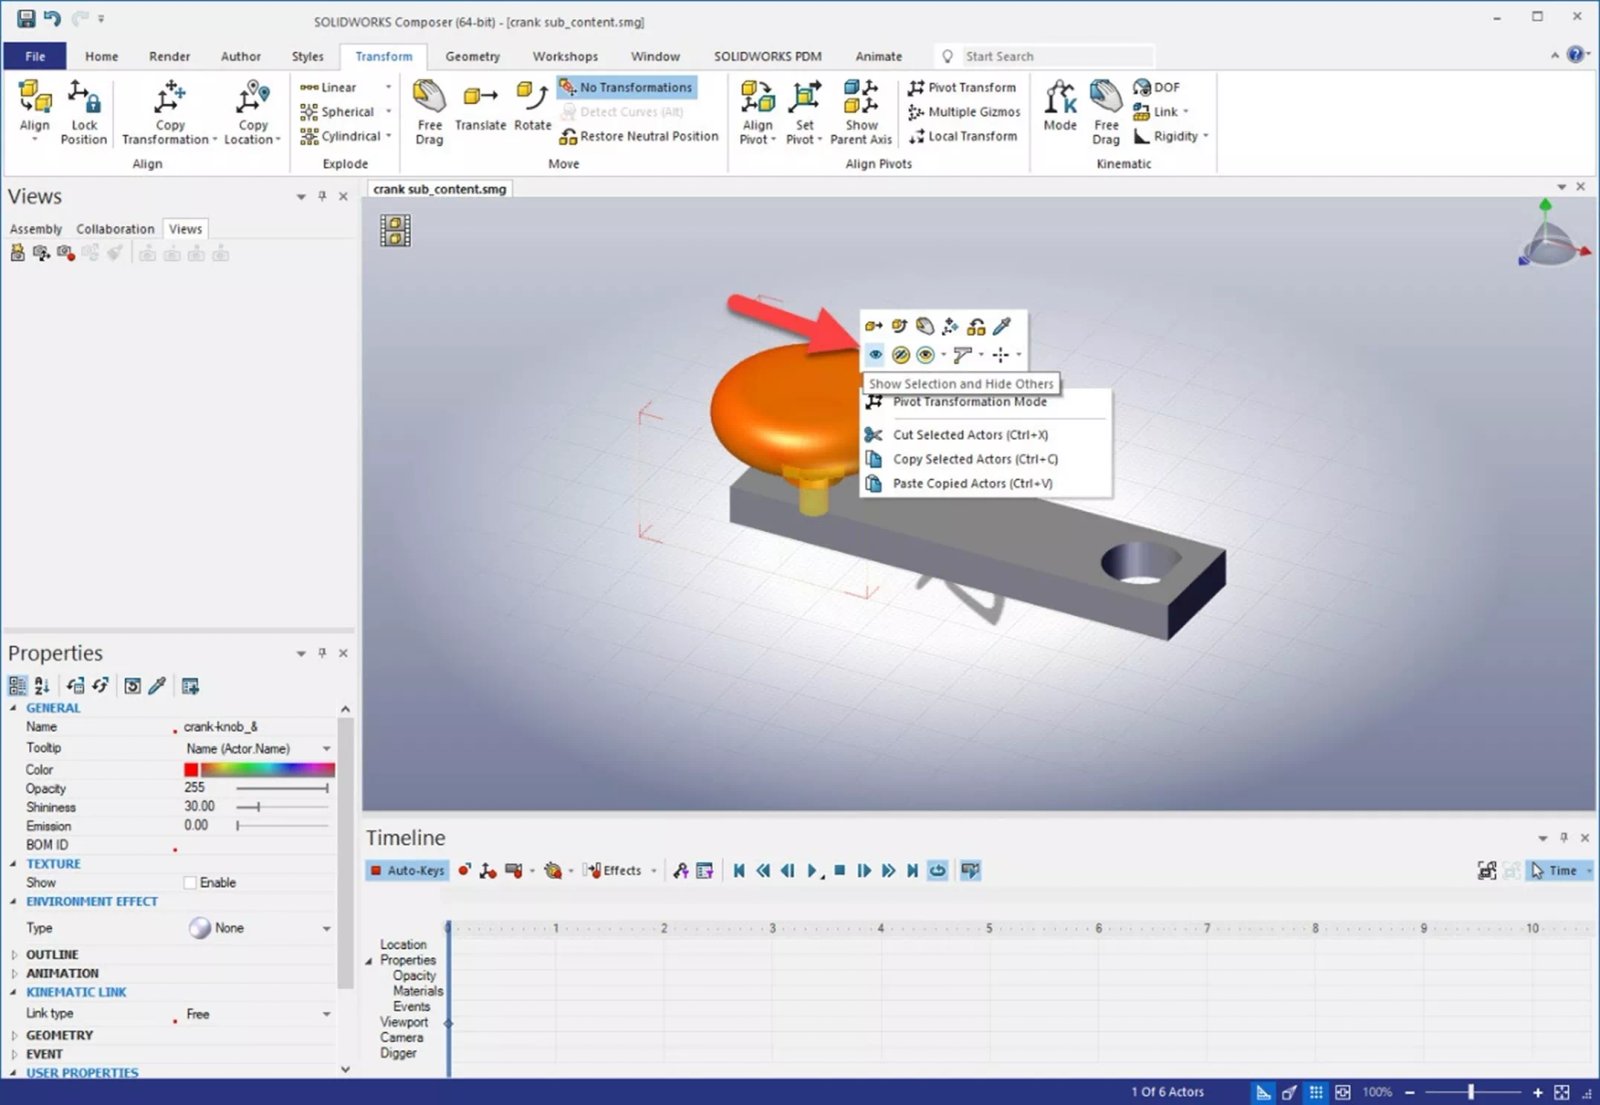
First, isolate a component to constrain by right-clicking the item in the viewport and clicking the eyeball. Note that we will be in the Transform tab for the entirety of this tutorial.
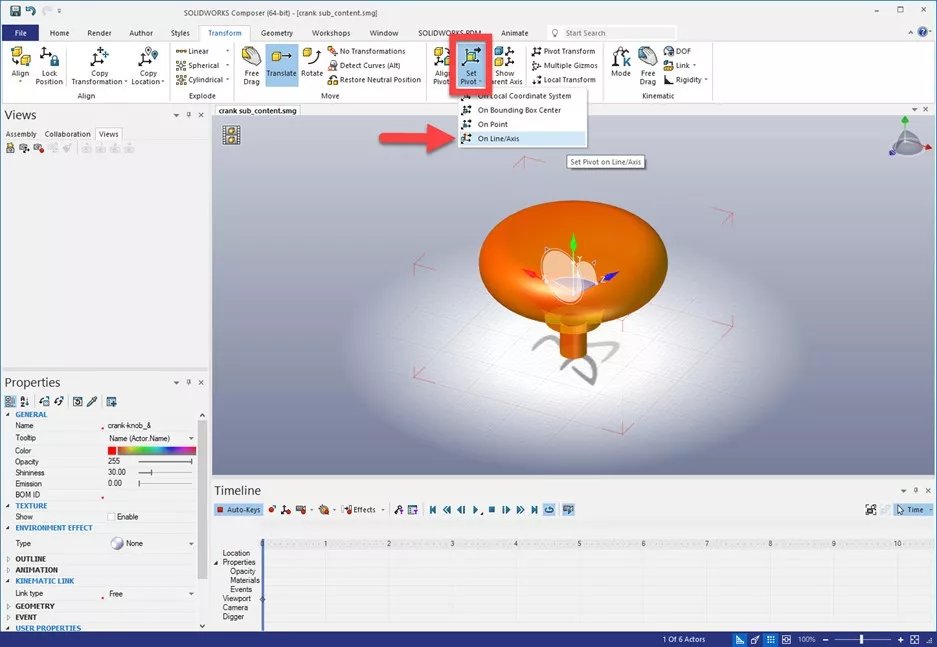
Next, select Set Pivot and specify On Line/Axis.
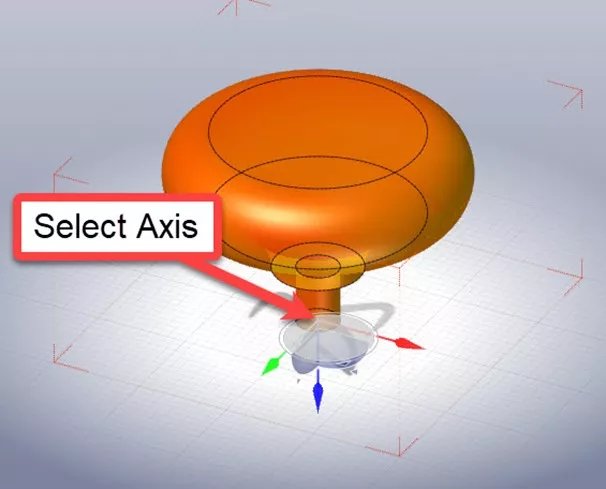
Select the Axis in the graphics area.
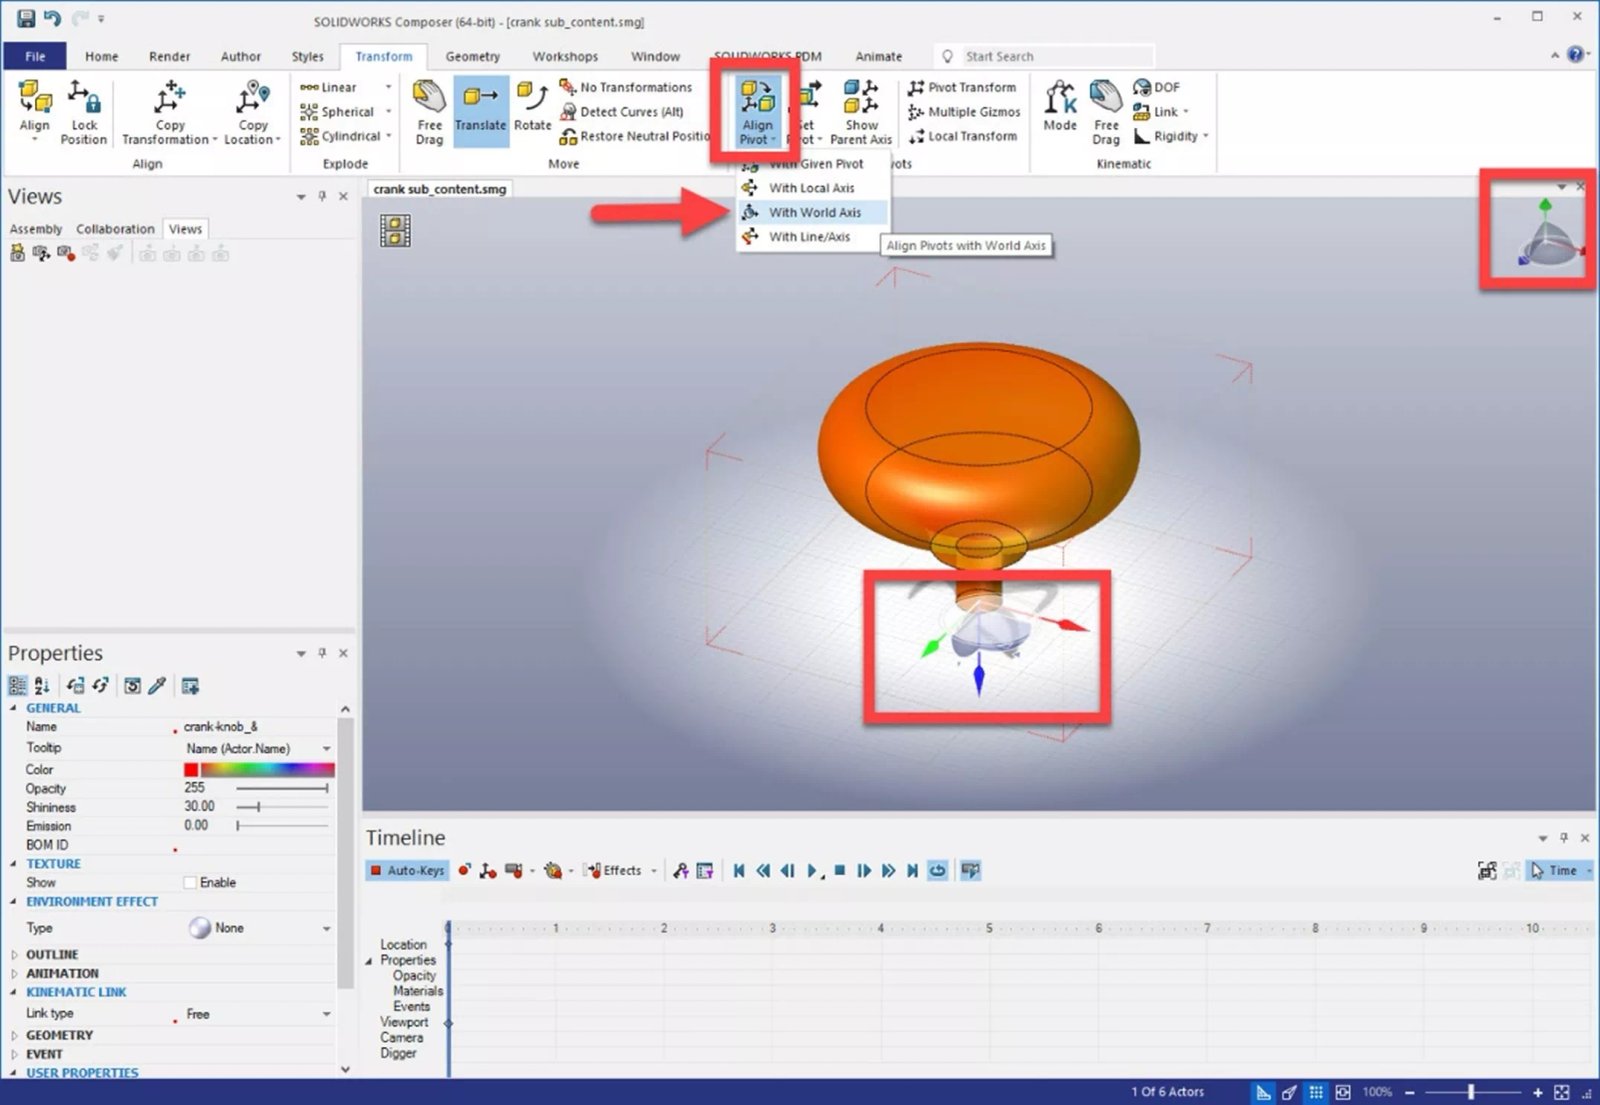
Notice the axis is not in sync with the World Axis in the top right corner of the screen. To fix this (and simplify the model), select Align Pivot and then With World Axis.
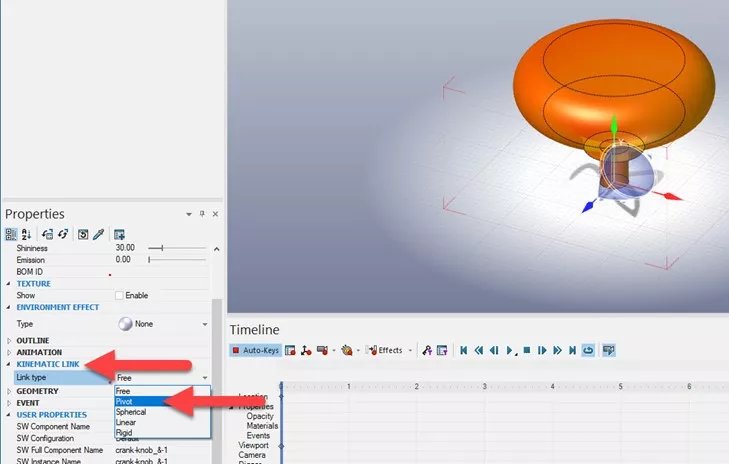
Under Kinematic Link, set the desired type. I chose Pivot.
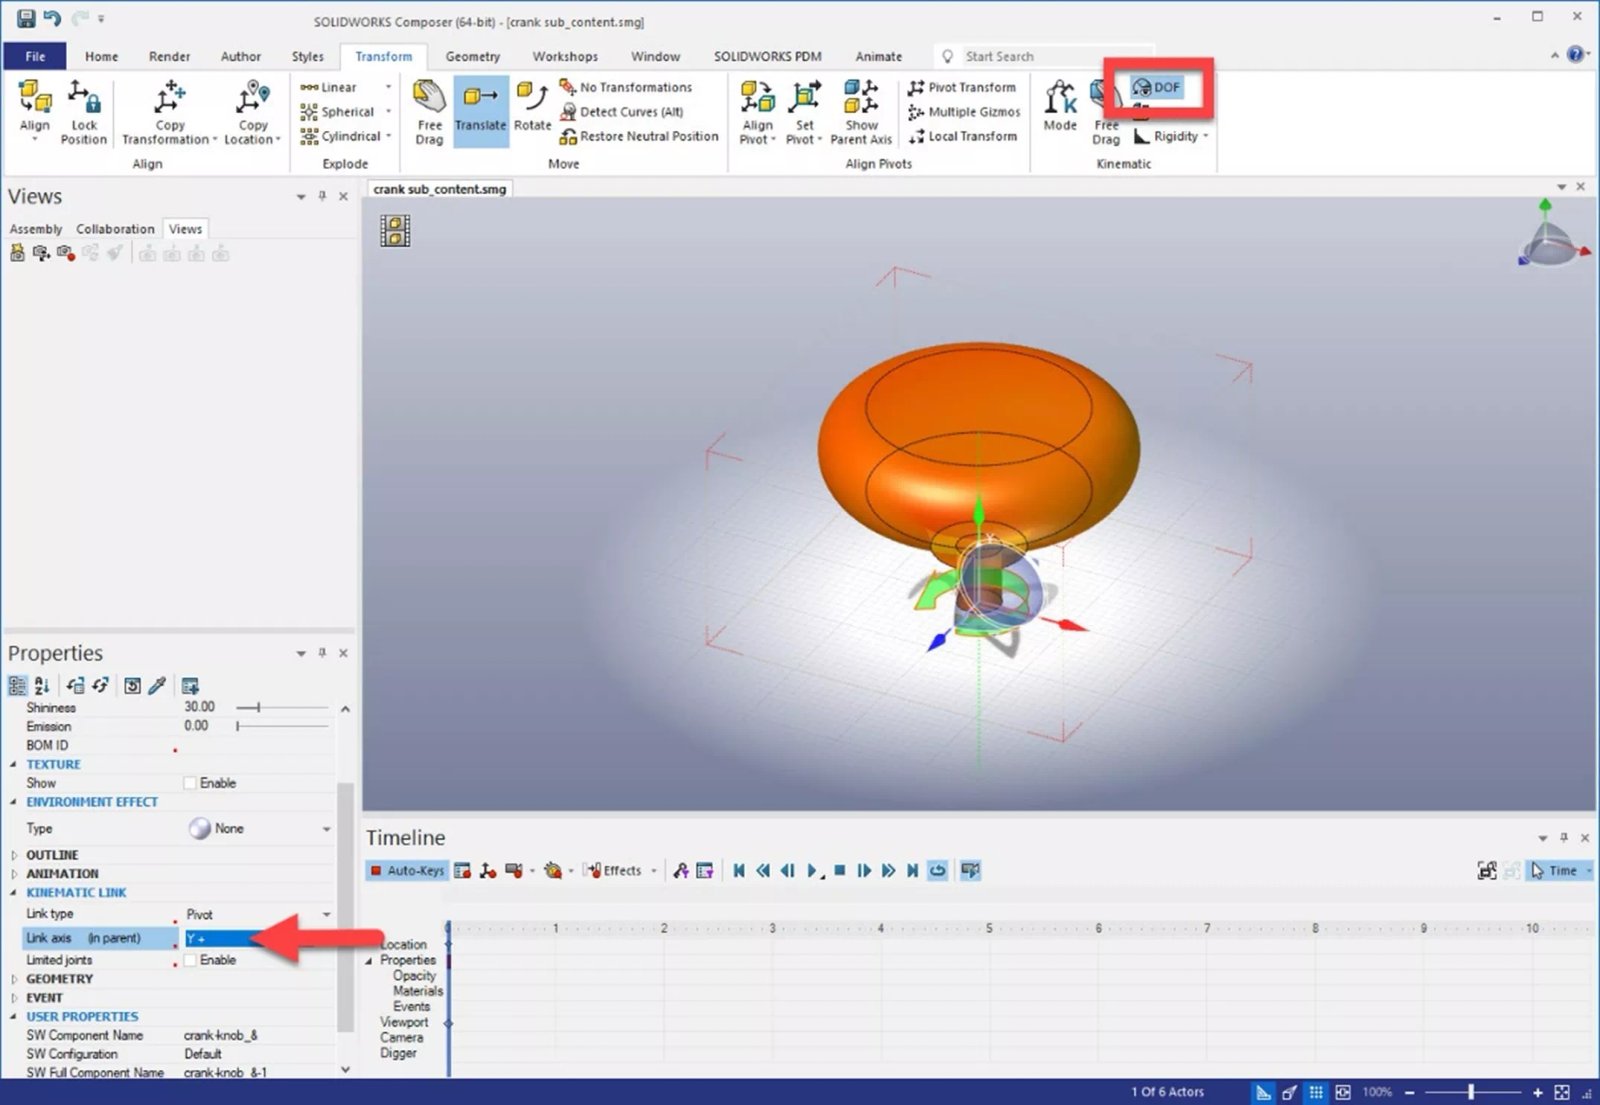
To view the axis on which the actor can rotate, select DOF for Degrees of Freedom. We can then specify the correct axis under Kinematic Link > Link axis.
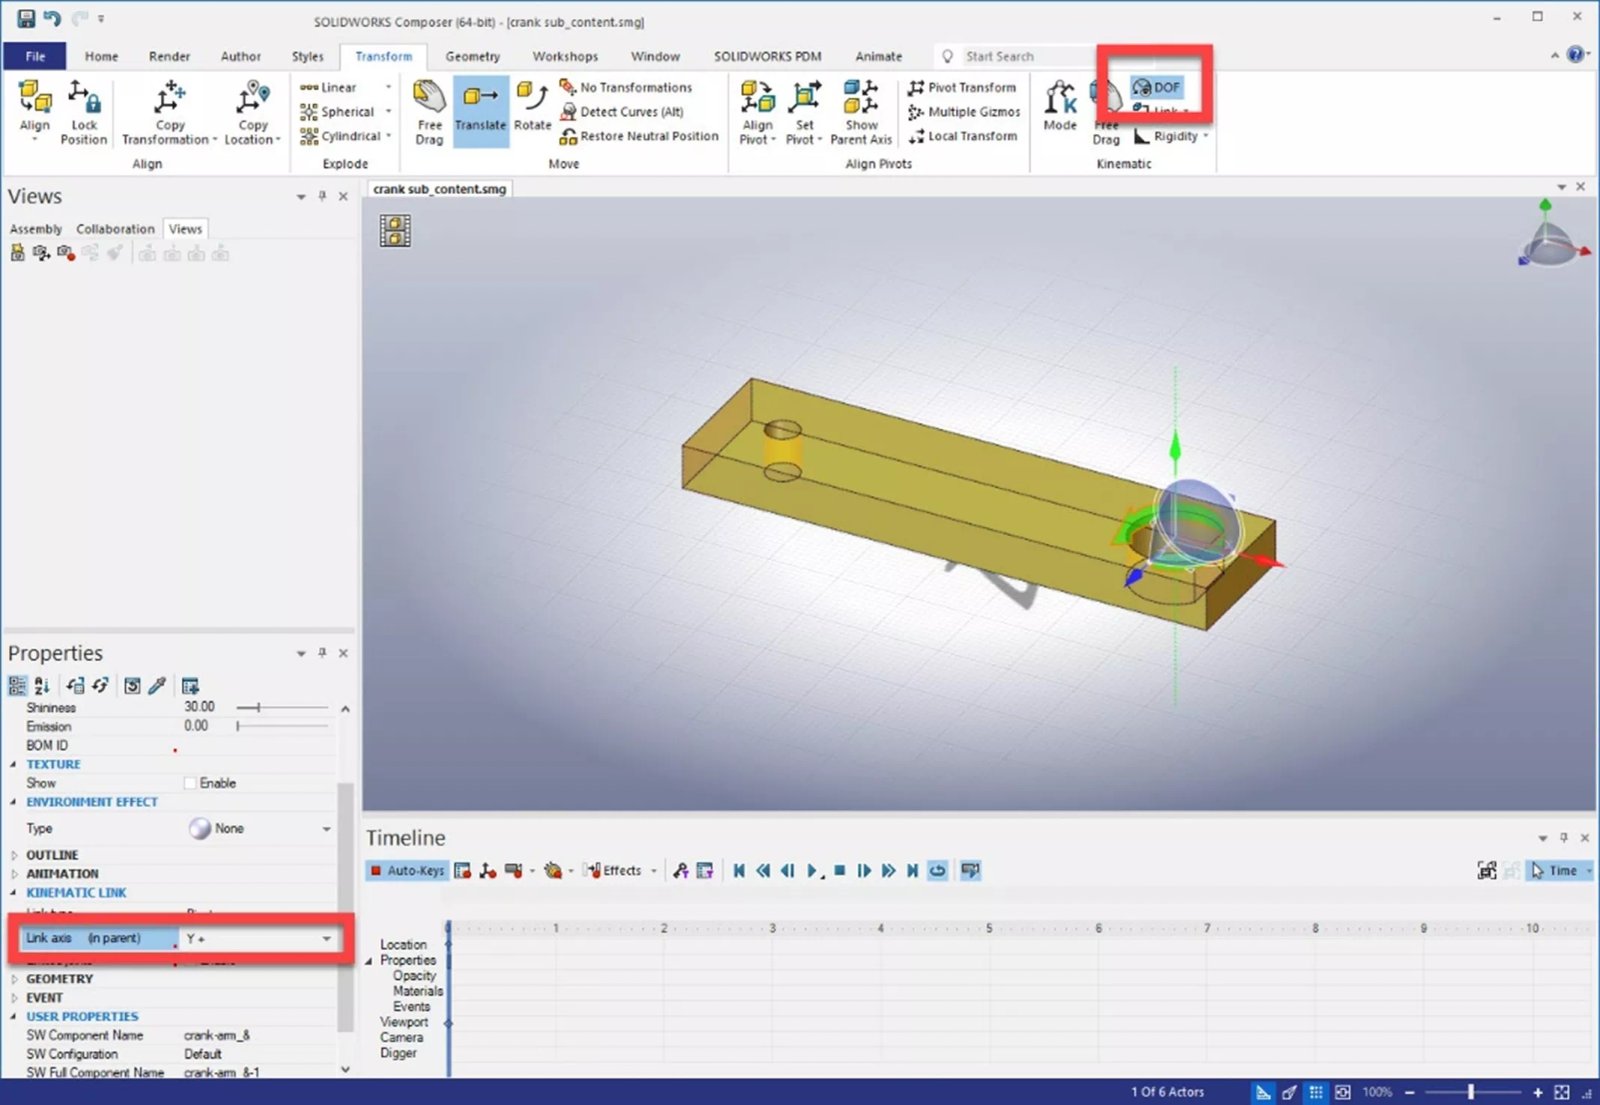
Make the necessary selections for any remaining actors that you wish to constrain. I made the same changes to the arm in this crank arm assembly.
Next, test the kinematic relationships to ensure that they are working correctly. All actors can be made visible by right-clicking in the viewport and selecting Show All Geometry.
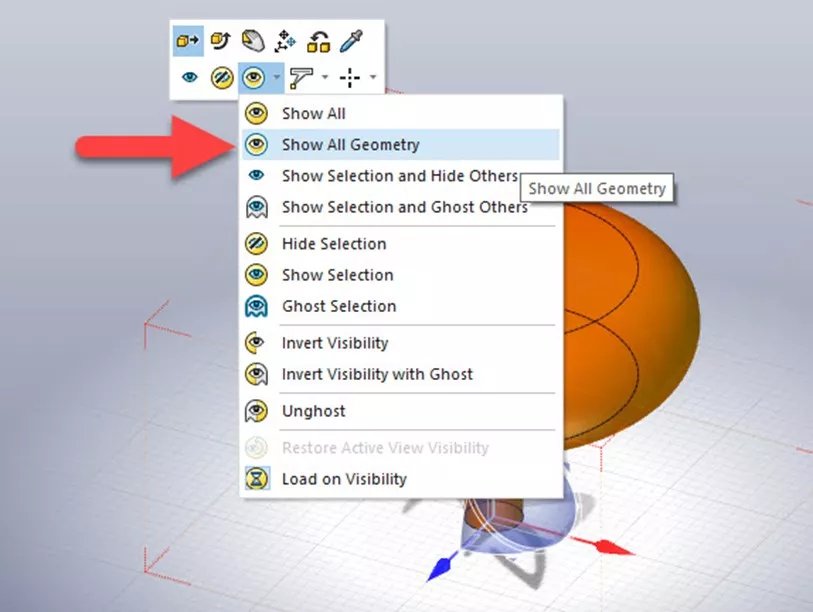
The degrees of freedom should still be visible, and Free Drag can be used to move the actors and to verify that they are appropriately constrained.
