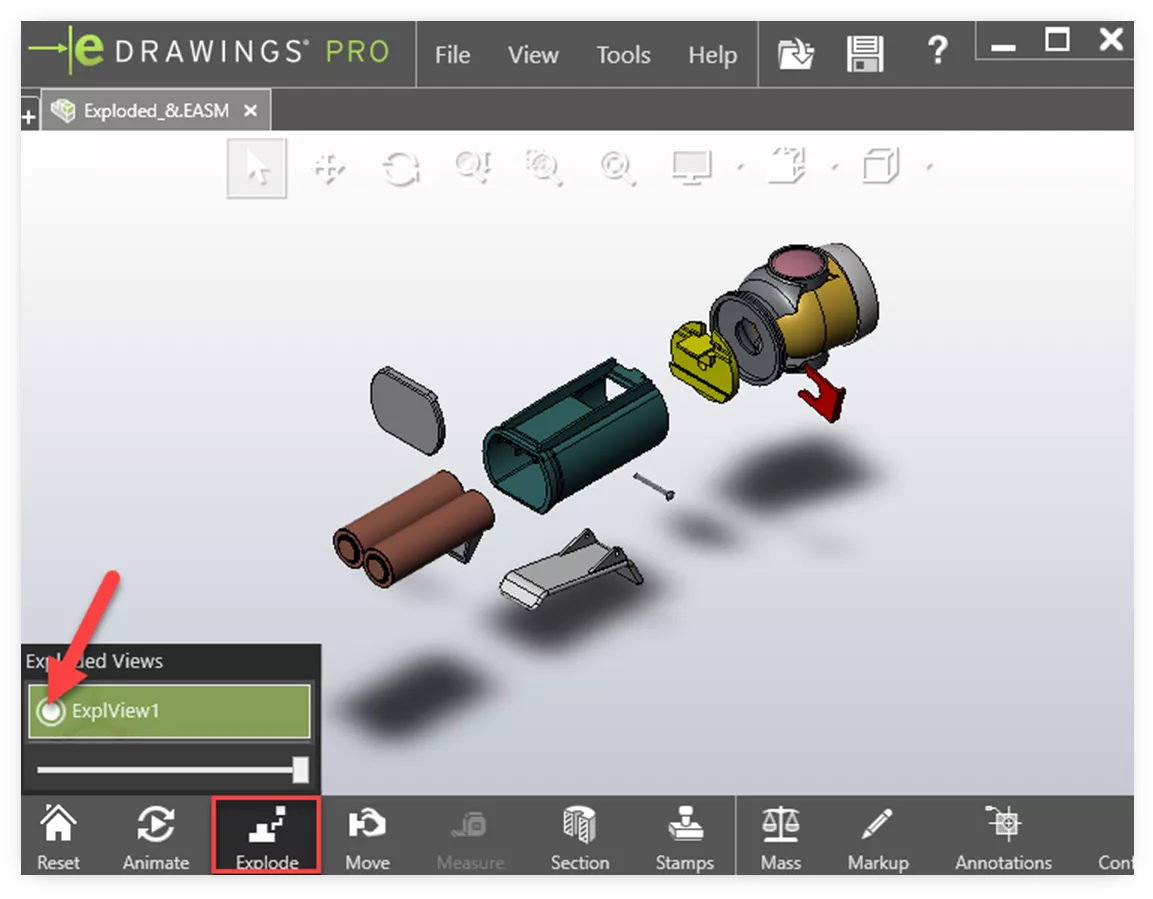
Since SOLIDWORKS 2014 and beyond, eDrawings can animate rotated explode steps in an assembly exploded view. This blog covers the simple steps of adding a rotated step to an existing exploded view and viewing the animation in eDrawings.
Create a Rotated Step in Exploded Views
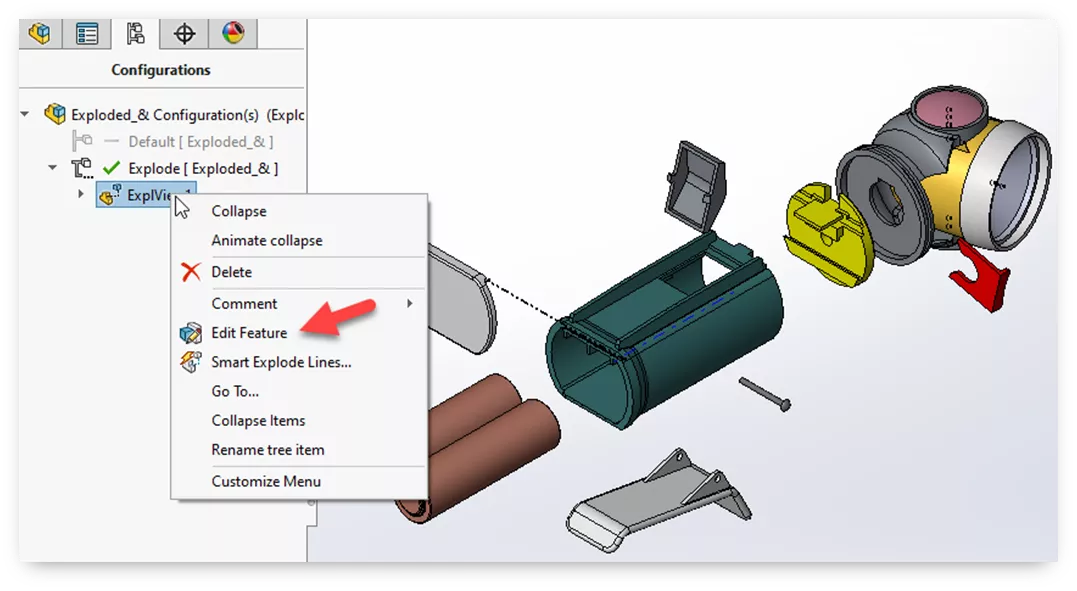
For this example, we have a flashlight assembly with an existing exploded view. We’ll right-click on the exploded view in the ConfigurationManager and choose Edit Feature.
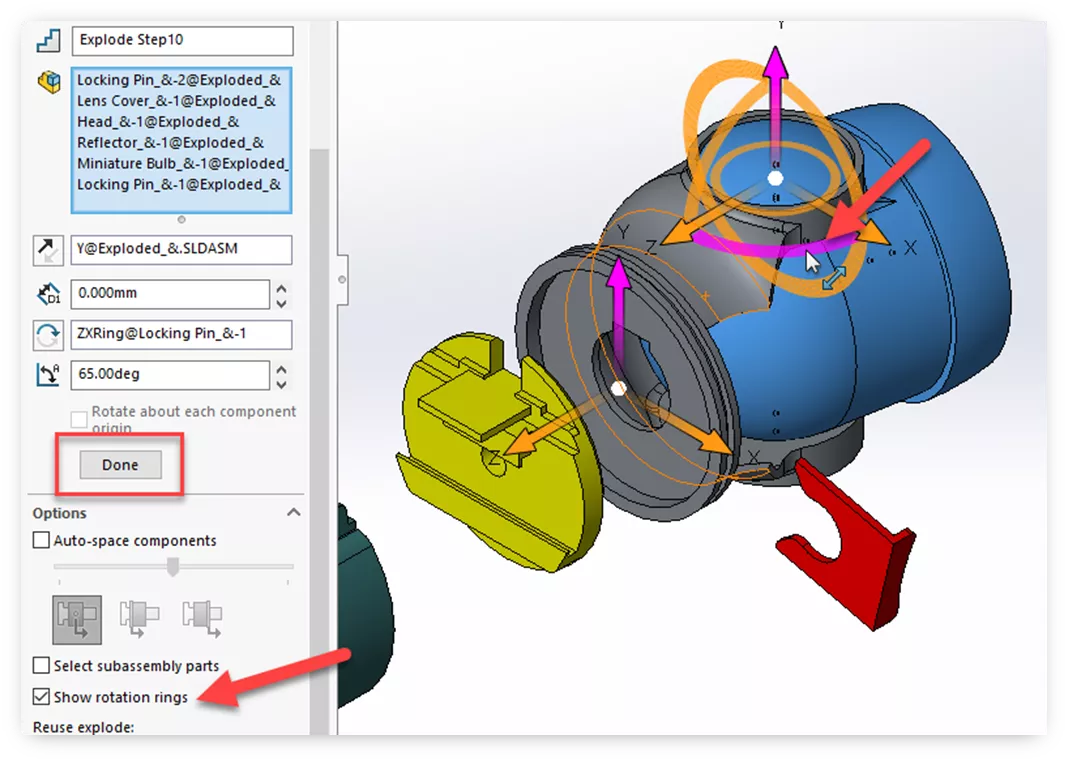
In the Exploded View PropertyManager, ensure Show rotation rings is checked under Options. To create a new exploded step, simply start selecting the components to be rotated. The move triad will show rotation rings for each axis. Click and drag the rotation ring in the desired direction to rotate the components, then click Done to complete the step. Click OK in the PropertyManager to exit the exploded view.
Note: The move triad will be placed on the last selected component, but one can drag the white dot in the center of the triad and move it to a new location if desired.
Show the Animation in eDrawings
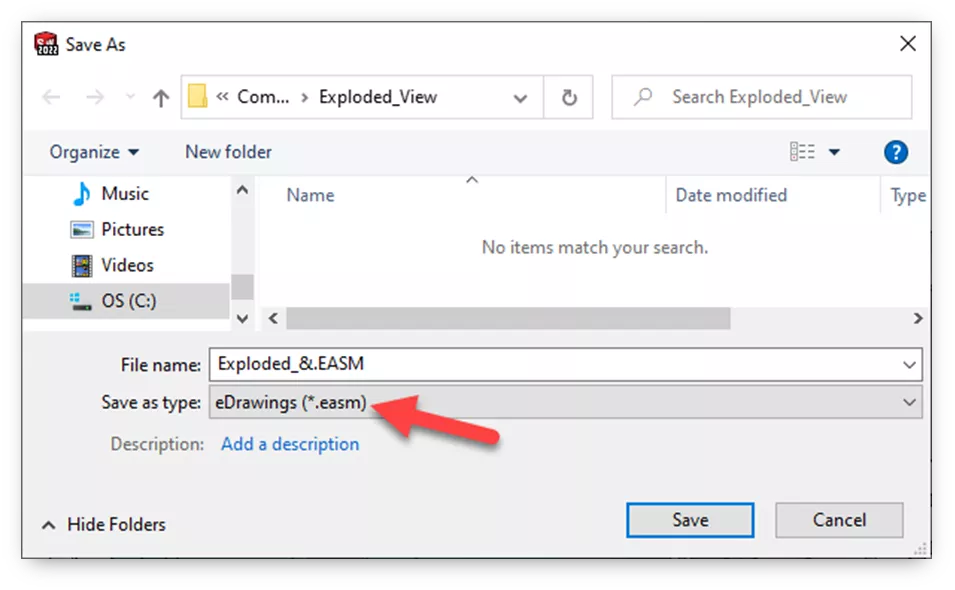
In SOLIDWORKS, go to File > Save As then change the Save as type to eDrawings (*.easm). Browse to the desired location and click Save.
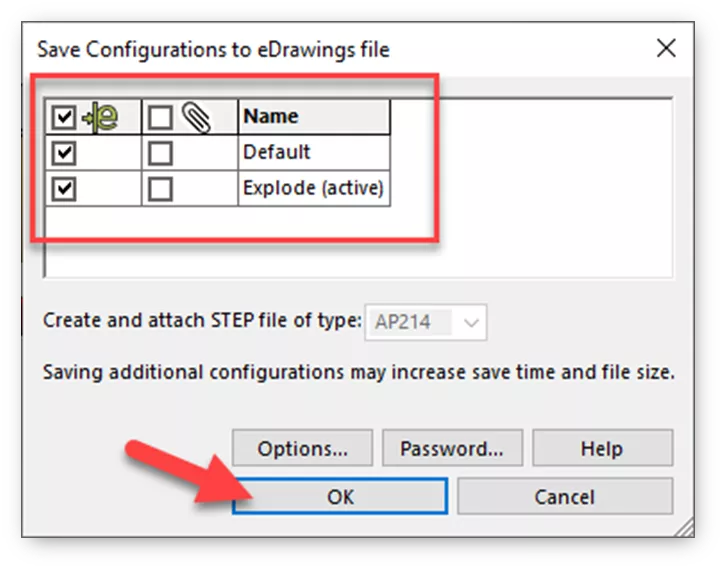
Next, the configuration dialog will pop up, allowing us to select the configurations we wish to export. We’ll choose both configurations and click OK.
Now, in eDrawings, go to File > Open and browse for the file. Click Explode to see the list of exploded views. To animate the exploded view, click the radio button next to the exploded view name to animate the exploded view. Toggling this button off animates the collapse of the exploded view. Also, there is a slider under the exploded view that can be moved to any point along the animation.
