Design Studies are a tool in SOLIDWORKS Simulation that allows us to evaluate or optimize designs by seeing how they perform when selected parameters are changed. These parameters can be model dimensions, global variables, Simulation or Motion study properties, or materials applied to bodies.
A .csv file can be exported and imported from the Table View tab of a Design Study containing a list of scenarios, parameters, and the values of those parameters in each scenario. A .csv file is a text file used for tables in which values are separated by commas.
Importing a .csv file will only populate the Variables section of the Design Study. To run it, first, set up the Constraints section and, if you have SOLIDWORKS Simulation Professional and the Optimization checkbox is checked, the Goals section. It is also necessary to define the parameters before importing a .csv. If the parameters referenced in the table do not exist in the model, the import will fail.
How to Format a Design Table .CSV
In their online Knowledge Base, SOLIDWORKS provides this example as a guide to how to format a .csv file that you want to import into a Design Study:
Design Set, 6, 3
Parameters, Status, Parameter1, Parameter2, Parameter3
Units, , N, N, N
Scenario 1, 1, 1, 2, 3
Scenario 2, 1, 2, 3, 4
Scenario 3, 1, 3, 4, 5
Scenario 4, 1, 4, 5, 6
Scenario 5, 1, 5, 6, 7
Scenario 6, 1, 6, 7, 8
When opened in Excel, it looks like this:
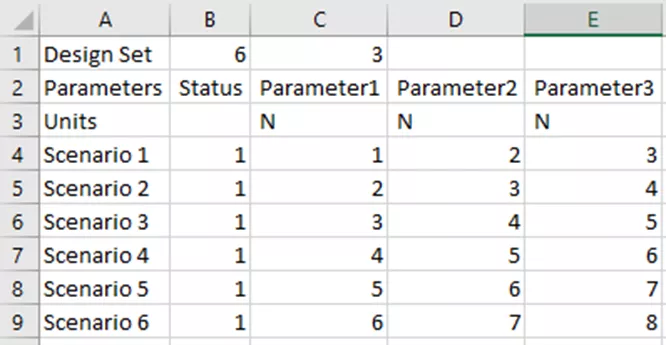
Figure 1: Example Design Study .csv in Excel
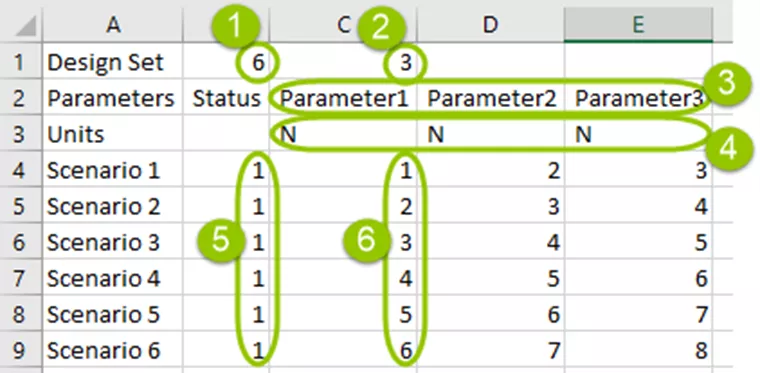
Let’s break down some of these values, specifically ones that will need to be modified for an individual Design Study.
-
- “6” here is the number of scenarios.
-
- “3” here is the number of variables.
-
- In the second row, after two cells with the words Parameters and Status in them, we’ll enter a list of parameters. Parameter1, Parameter2, etcetera, should be replaced in the .csv with the actual names of the parameters.
-
- Below the parameter names are the units associated with those parameters. In the example above, those units are newtons (N).
-
- The Status column determines whether the scenario is active. 1 corresponds with the scenario being active/checked, and 0 corresponds with it being inactive/unchecked. All scenarios will be imported regardless of their status.
-
- The columns below the parameter name contain the values of that parameter in each scenario.
Cantilever Bracket – Example
Let’s apply this to an example using the Cantilever Bracket part from SOLIDWORKS’ Shape Optimization Through Design tutorial.
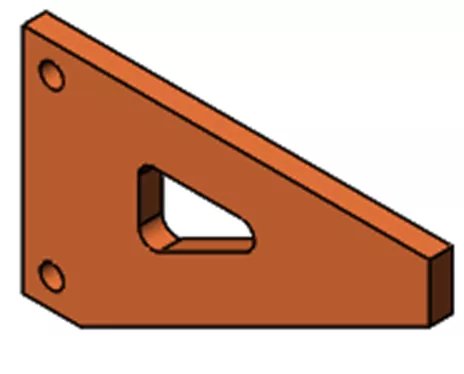
Figure 2: SOLIDWORKS Simulation Tutorial Cantilever Bracket
We want to run a series of scenarios in a Design Study to evaluate how this part performs when the triangular cutout in the center changes size. The size of the cutout is controlled by three sketch dimensions.
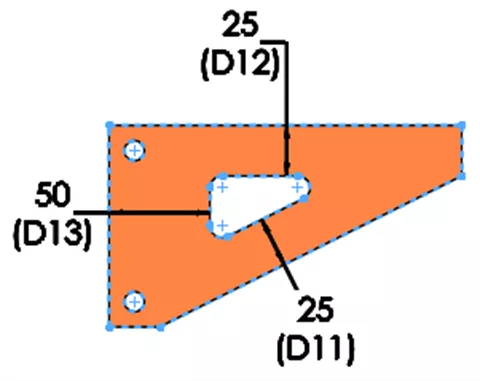
Figure 3: Sketch Dimensions Controlling the Center Cutout Size
The first step is to create parameters linked to each dimension. New parameters are created and edited in the Parameters dialog box, accessible via Insert > Design Study > Parameters.
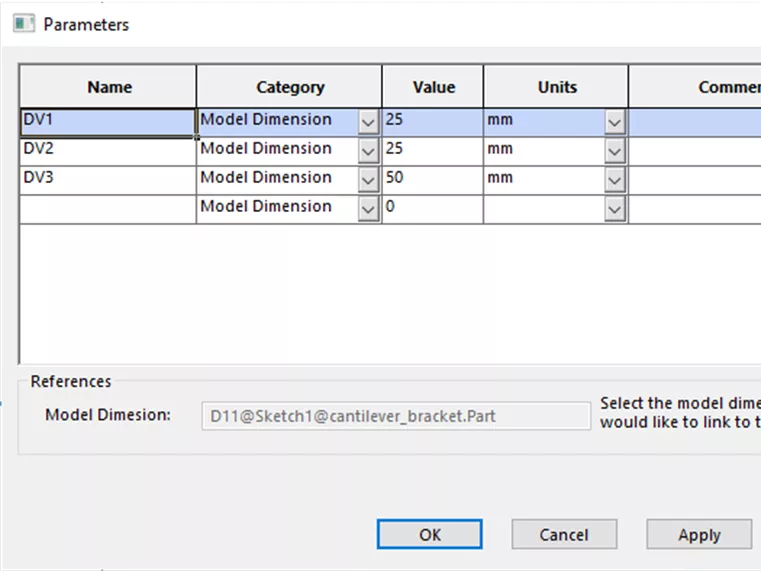
Figure 4: Parameters dialog
With the parameters defined, we can create our .csv file.
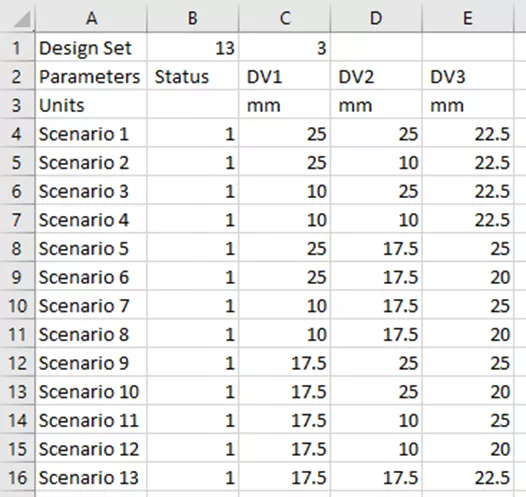
Figure 5: Table with Design Study Variable Data
Reviewing the table above, we can tell that this Design Study will have thirteen scenarios and three parameters. All thirteen scenarios are active. The parameters are named DV1, DV2, and DV3, and the units of all three are mm.
Save the table as a .csv. To import it into a Design Study, create a new Design Study by right-clicking an existing tab at the bottom left corner of the SOLIDWORKS window and selecting Create New Design Study.
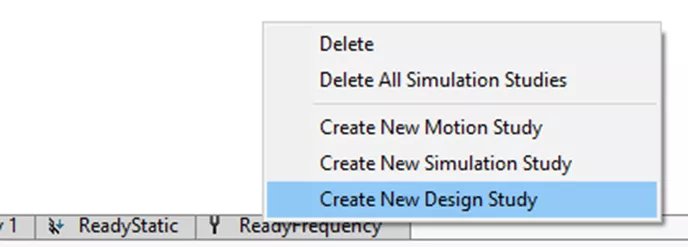
Figure 6: Create New Design Study Option
In the Design Study, go to the Table View tab and click the Open icon.
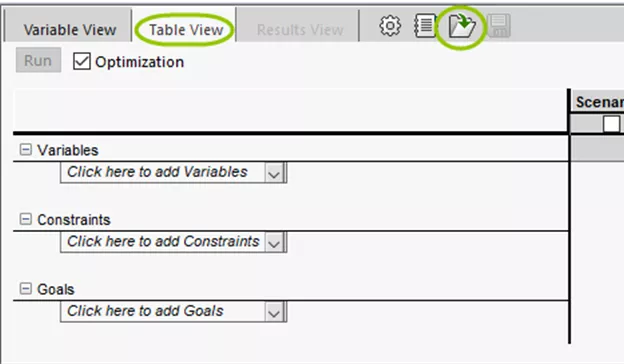
Figure 7: Design Study Table View Tab
Browse to the .csv file and open it. Doing this will populate the Variables section with information from the .csv table.
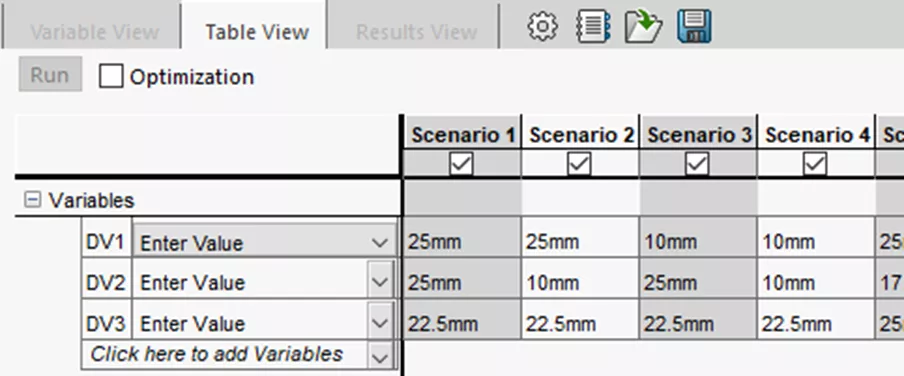
Figure 8: Variable Section of Table View with Data from .csv File
With all the variable data loaded, we can run the study.

