In SOLIDWORKS, Multiple Mates is a useful shortcut that can save a bit of time when making several mates to a single reference. Whether there is a need to align pieces of a collapsing telescope or syringe, or to make a surface on multiple parts coincident to each other, Multiple Mates streamlines the process of adding those mates. And like many tools within SOLIDWORKS, it is intuitive and user-friendly.
Using Multiple Mates in SOLIDWORKS
Multiple Mates can be found in the Mates tool in an assembly. In the Mate PropertyManager menu, select the SmartMates button to activate it.
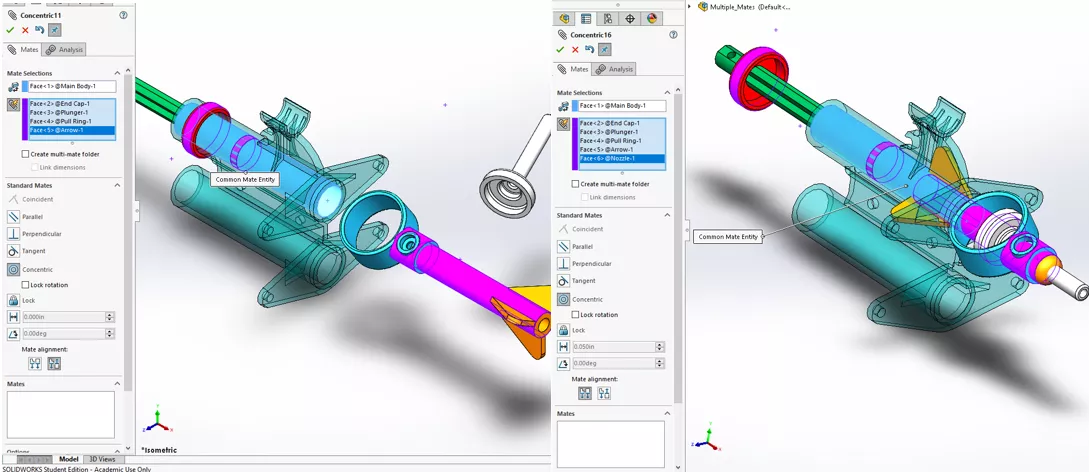
The first selection is the reference that the rest of the references selected will be mated to. From there, selecting additional references will add the appropriate mate to that reference.
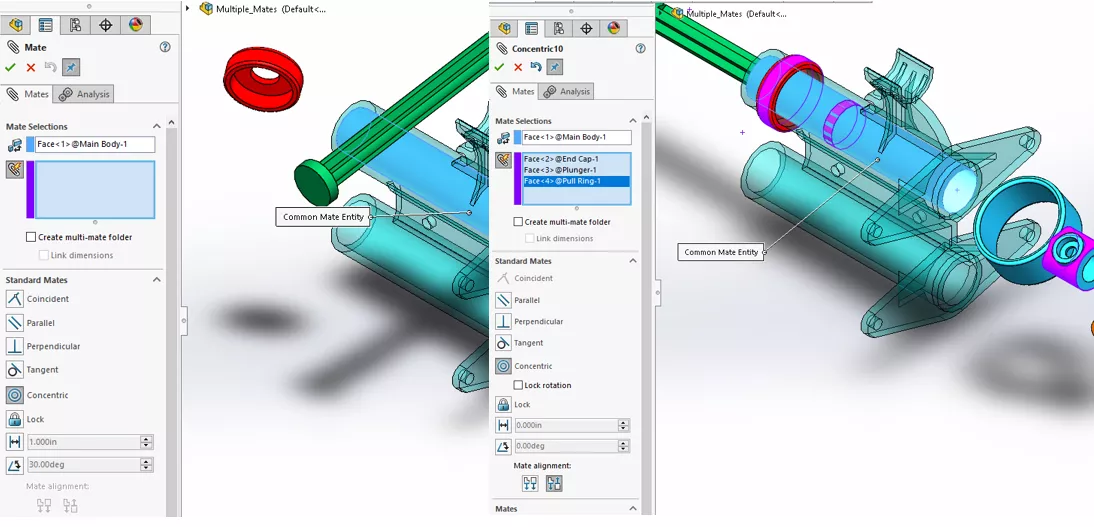
Occasionally, the mate will be aligned incorrectly. If noticed right away, selecting the alignment buttons will realign that mate, but selecting the mate later and flipping alignment will work just as well.
Linking Mates
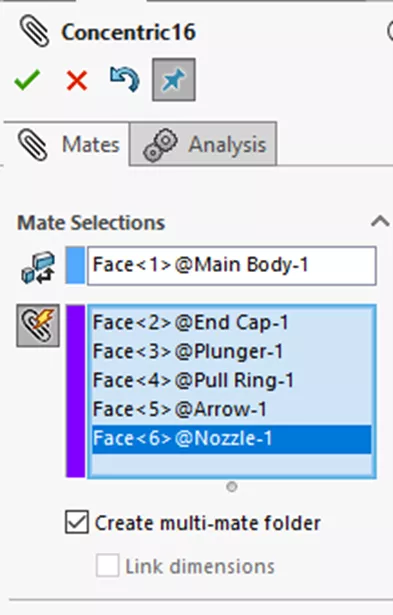
If the selections are confirmed, Multiple Mates will add each of those mates which can be found again in the Mates folder. However, in this instance, we will want to come back to this set of mates and edit them all together again in the Multiple Mates selection window. To make this simple to do as well as cleaning up the mate folder, the Create multi-mate folder option will be selected.
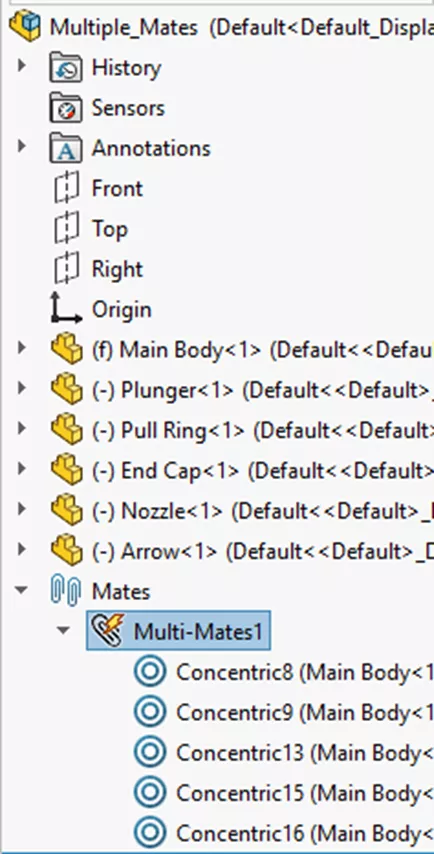
Now when we confirm these mates, a subfolder in our Mates folder has been added that contains each of these associated mates.
An additional option exists for dimension mates that links the value of each of the dimensions, so they are all the same value. This is located just below the Create multi-mate folder option.
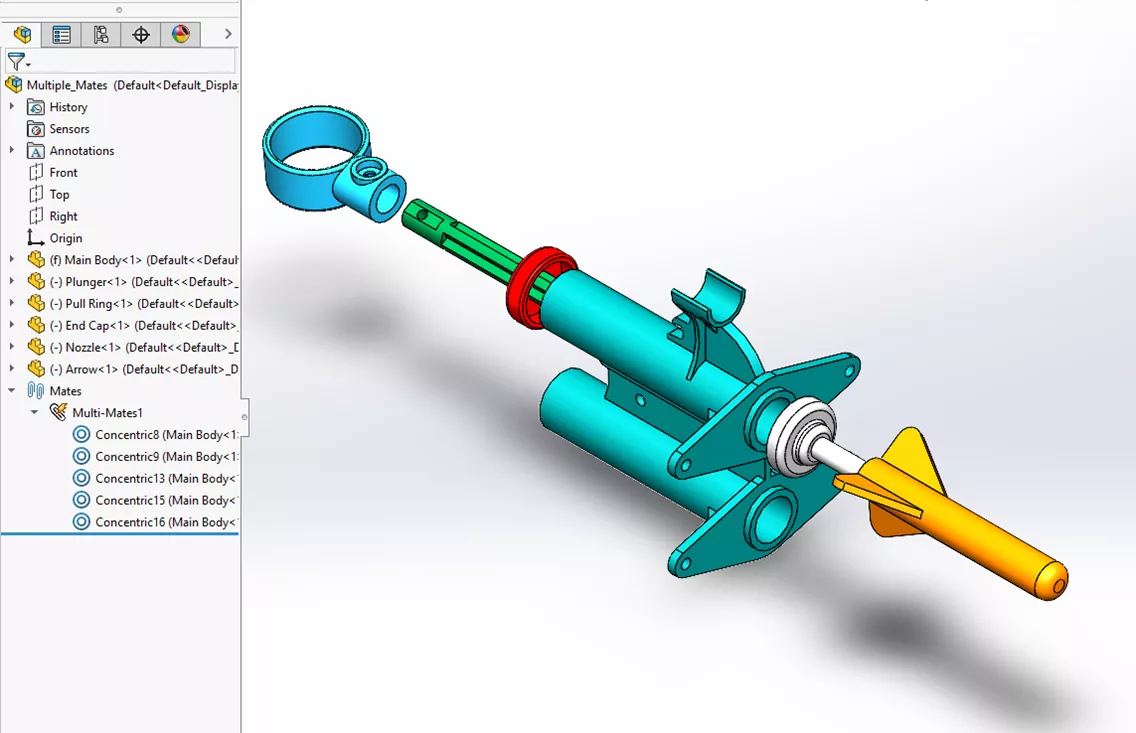
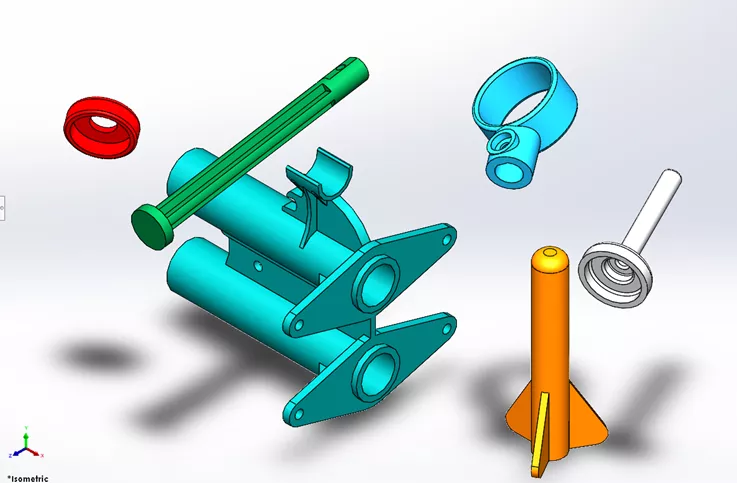
Results
After confirming each of the references that Multiple Mates will add, the general form of the assembly has taken shape and the remaining mates can be added in short order.