

Sheet Metal is a feature in SOLIDWORKS that allows users to create bend and flat patterns simultaneously. When paired with the option to save files as .dxf for easy laser cutting, SOLIDWORKS becomes the preferred choice for industry leaders. SOLIDWORKS also allows users to create templates. These are starting points for your files, saving you even more time.
One of the advantages of using templates is that they allow you to preselect various settings, such as units and color selections, so you don’t have to change them each time you start a new file. Sheet Metal has its own set of settings. One of which is the gauge table.
Whether you work with multiple gauge tables or just one, creating a template with the gauge table already selected can be very beneficial. However, a template that includes a gauge table can be a bit complicated, especially since sheet metal settings require a configured sheet metal feature. Let’s walk through the process of creating a template that incorporates a gauge table.
Adding a Gauge Table Template in SOLIDWORKS
-
- First, create a new file. Start your sheet metal part with just a line or a simple sketch. Check Use gauge table and select the table you want to use for this template.
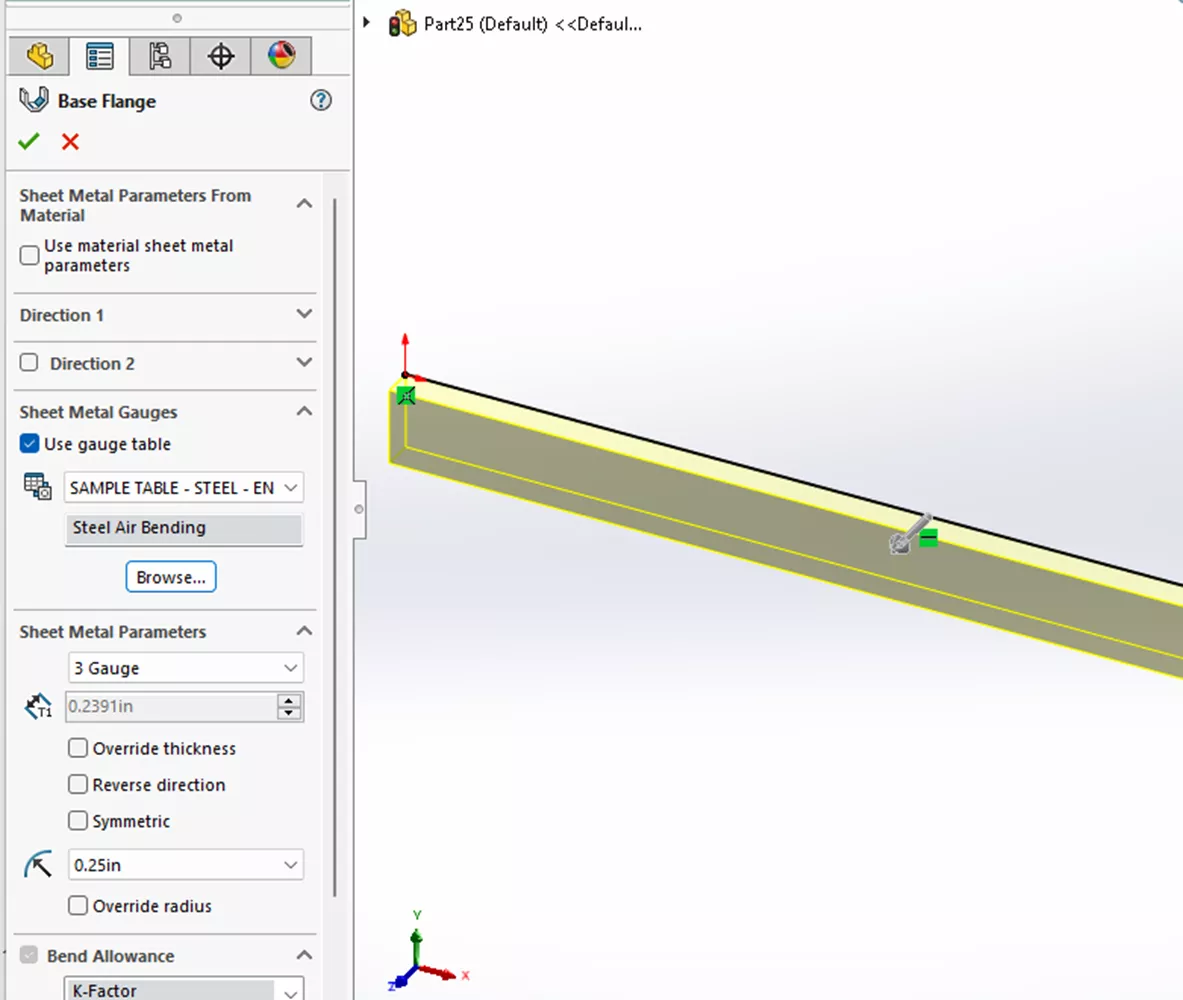
- First, create a new file. Start your sheet metal part with just a line or a simple sketch. Check Use gauge table and select the table you want to use for this template.
-
- Delete the simple geometry you created. Notice how the sheet metal properties are still in the FeatureManger Design Tree.
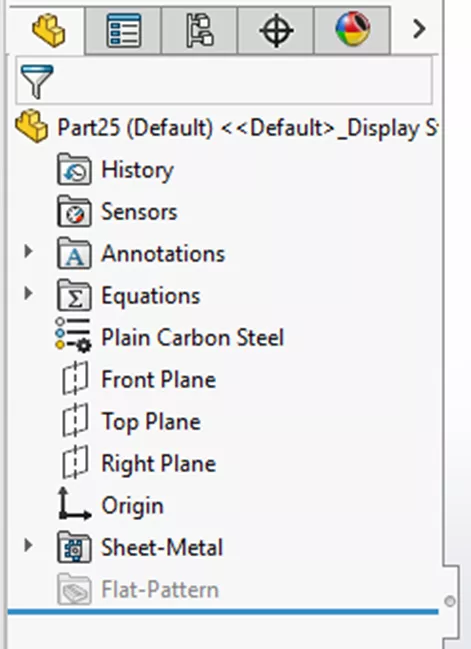
- Delete the simple geometry you created. Notice how the sheet metal properties are still in the FeatureManger Design Tree.
-
- Save the part as a Part Template.
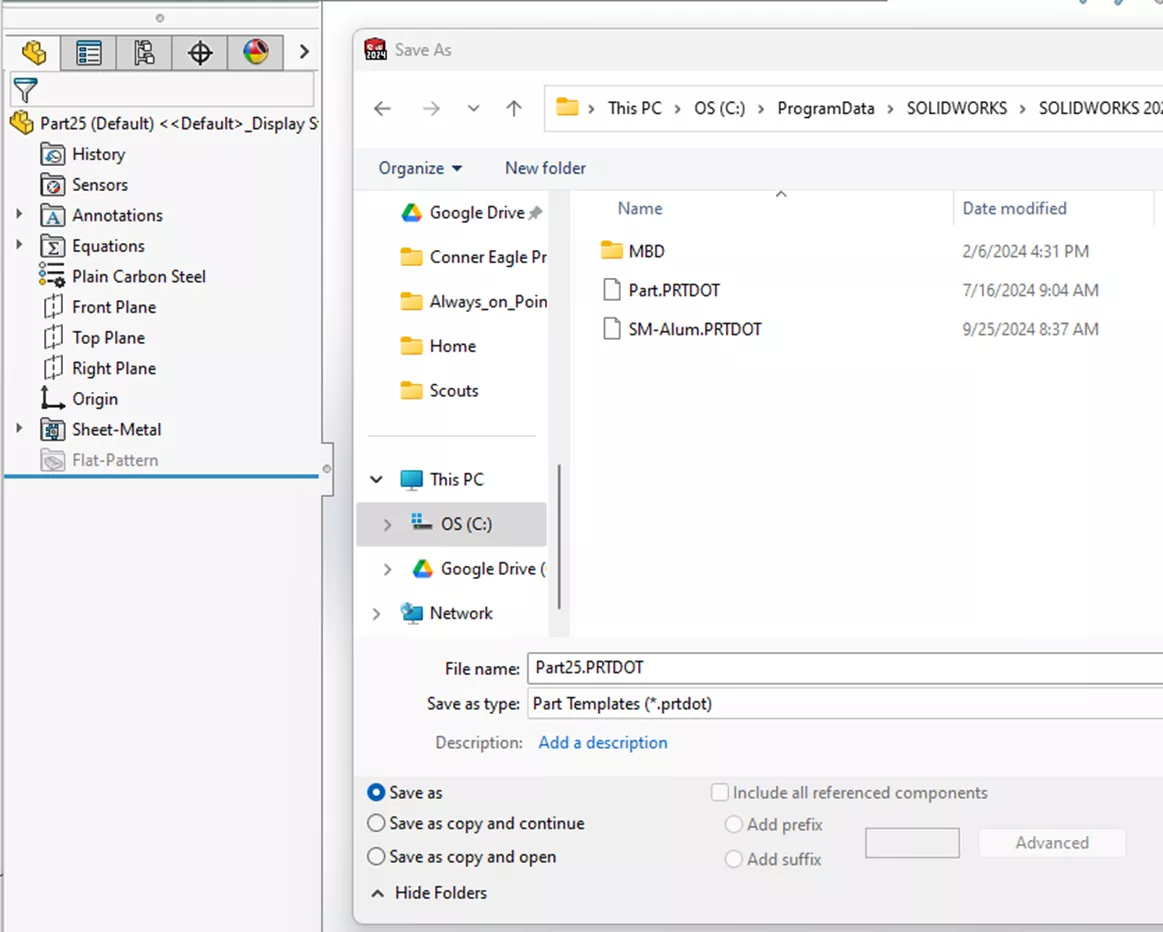
- Save the part as a Part Template.
-
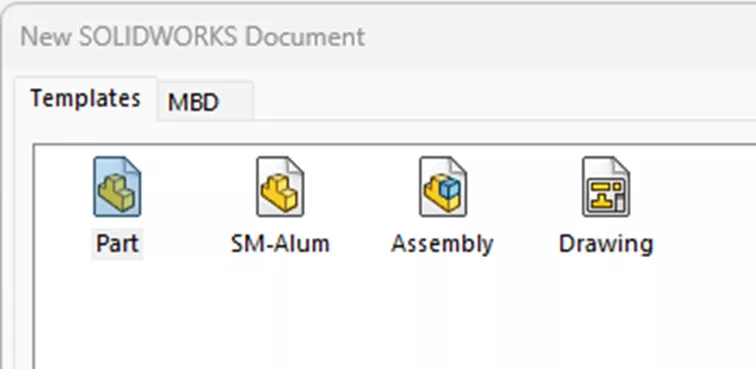
- Create a new file with the new template.
-
- With the sheet metal properties in a simple template, if you have multiple frequently used gauges or materials, you can create as many templates as you need to cover those common options.