Getting an Inspection drawing set up so that the inspector can clearly interpret it is vital. One way SOLIDWORKS Inspection can help is by creating sub balloons. In this tutorial, we explain how to do so in the Standalone interface.
Creating Rows for Each Instance
When you have a characteristic with multiple instances (e.g., holes or fillets), you may want to call out each one of those instances on the drawing. But, before you can do this, you must have rows for each of those instances on the Characteristics Tab of the Table Manager; either individually or automatically.
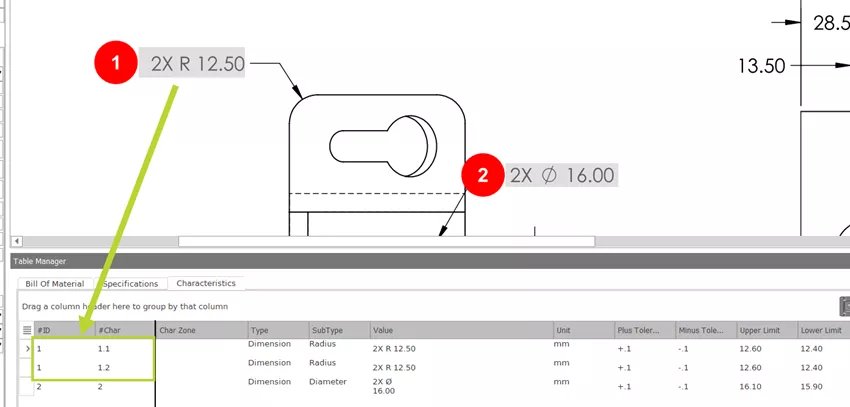
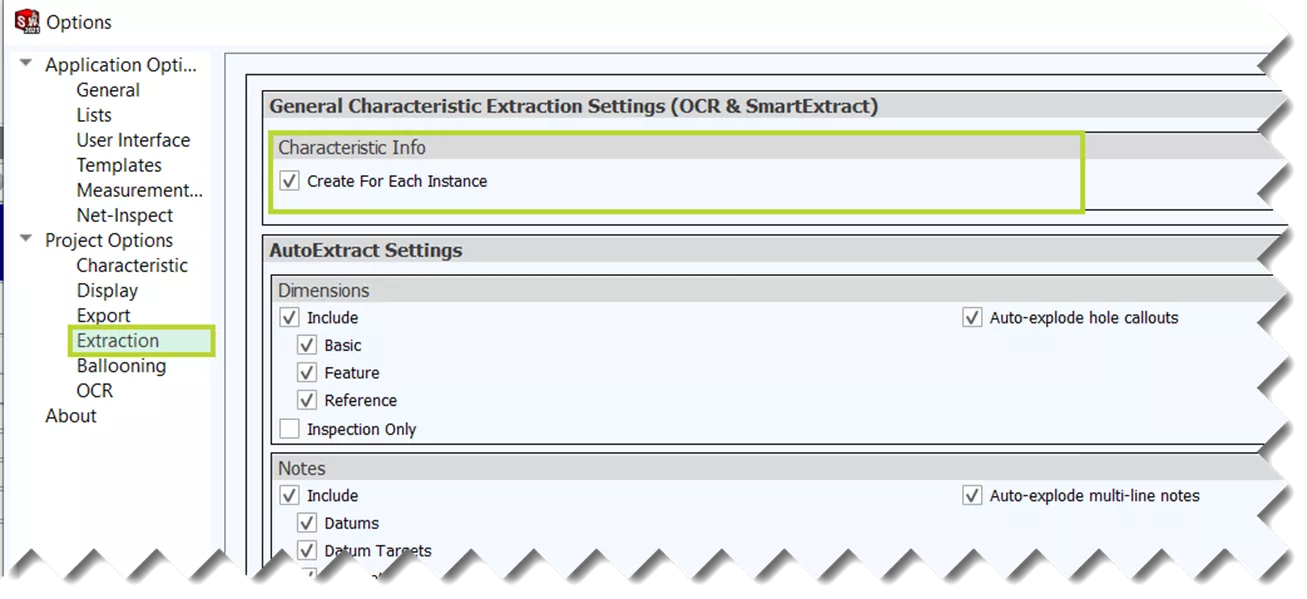
To do this automatically, upon creation of the characteristic of a dimension called out with a quantity greater than one, an Extraction Project Option can be set to Create For Each Instance. (This can also be turned on and saved in the Project Template).
If this setting was unchecked when you created the characteristic, and there is only one row in the Characteristics Tab, you can still add them manually. To do so, select the characteristic, then choose the icon next to the Quantity in the Characteristic Properties. (Quantity must be greater than one.)
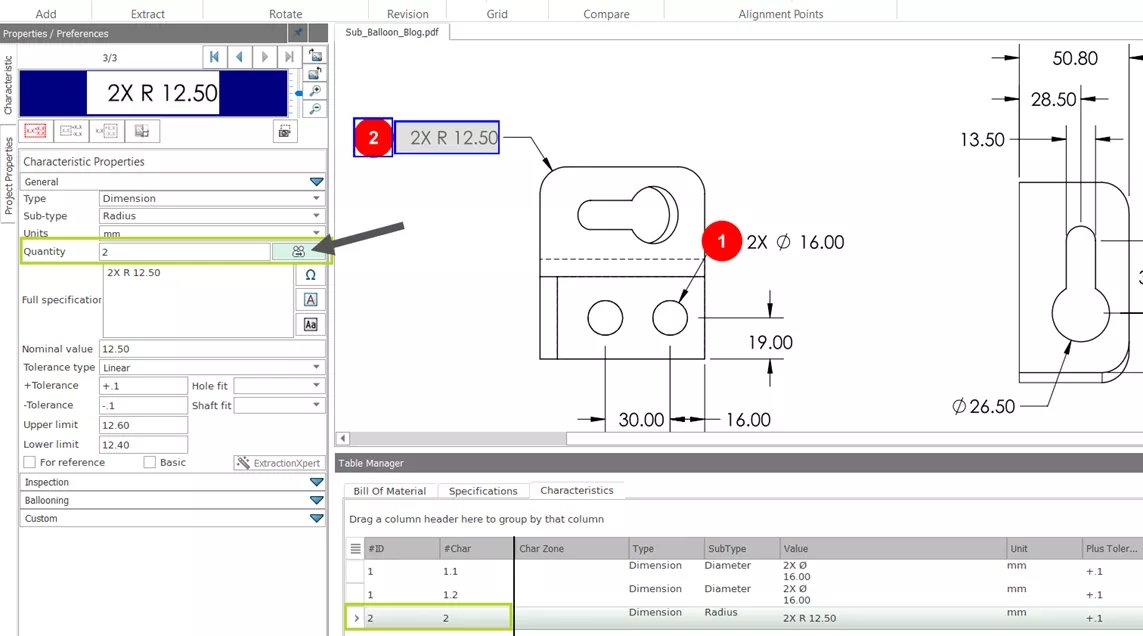
This will add a row for each instance on the Characteristics Tab.

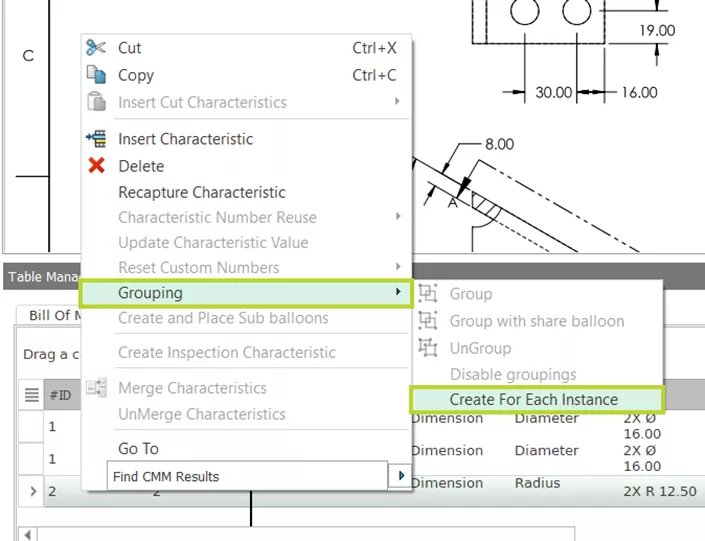
Alternatively, right-click the Row on the Characteristics Tab and select Grouping > Create for Each Instance.
Create Sub Balloons
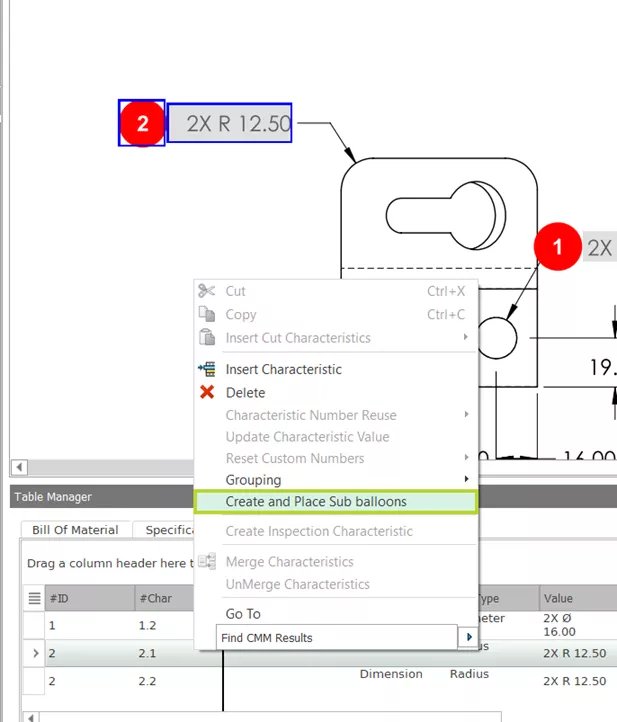
Now that you have characteristics with rows for each instance, you can create sub-balloons. Right-click an instance and choose Create and Place Sub balloons.
Then, when you click anywhere on the drawing, it will create the ‘X’.2 balloon, and the original balloon will become ‘X’.1. If the quantity is greater than two, keep clicking until all the subsequent sub balloons are placed (‘X’.3, ‘X’.4, etc.). Feedback at the cursor lets you know the quantity you are going to create and how many you have left to go in the command.
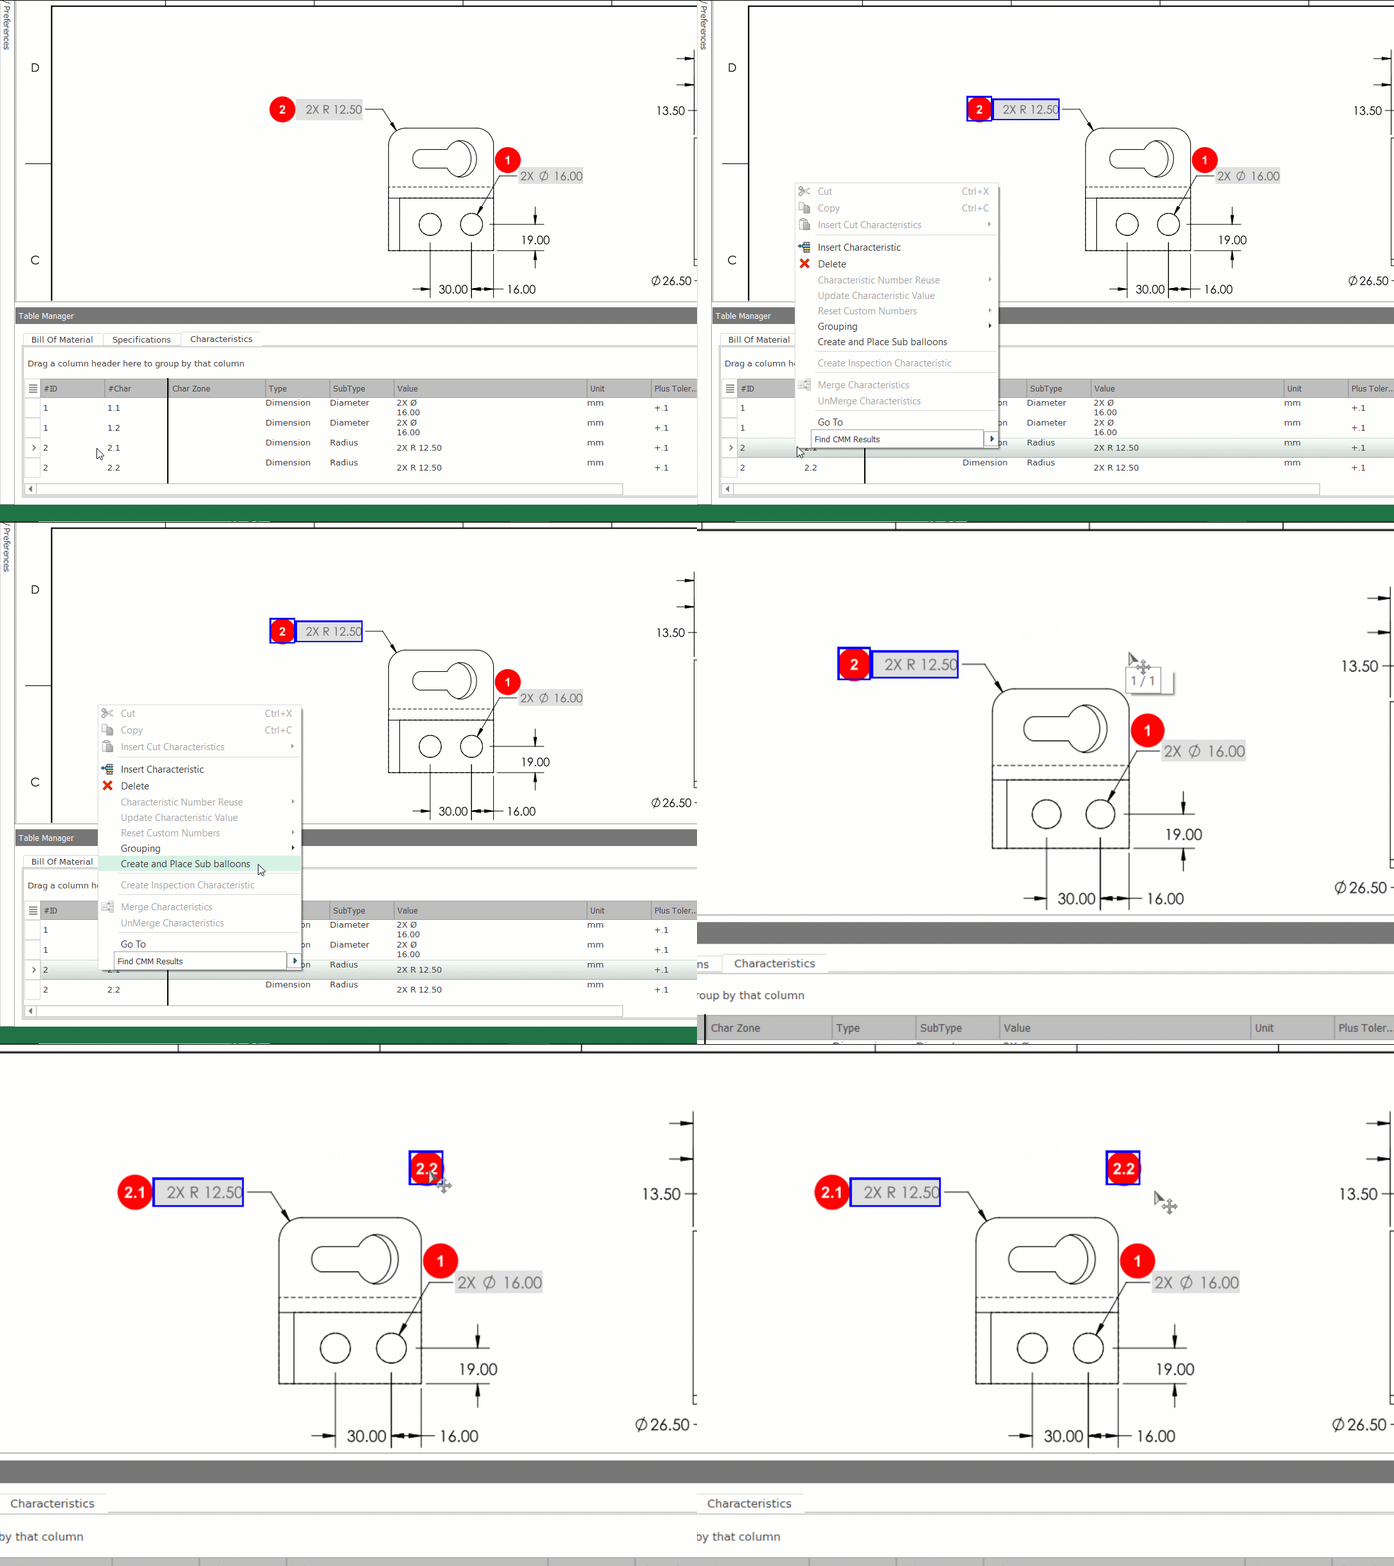
If the balloons are not exactly where you want them, move them.
Reverse It
If you do not want to have the sub balloons and rows for each instance, remove them. Right-click in one of the rows and choose Grouping > Merge To Single Instance.
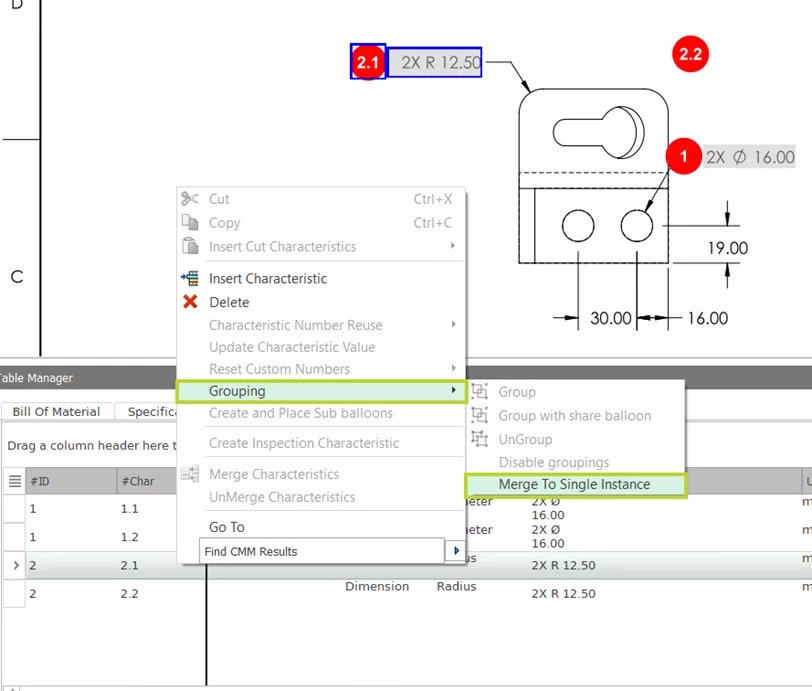
The sub balloons will then go away, the ‘X’.1 balloon will return to just ‘X’, and all the rows for the additional instances on the Characteristics Tab will also go away.
The quantity in the Characteristic Properties will reflect the total number merged.

