• This forum is the machine-generated translation of www.cad3d.it/forum1 - the Italian design community. Several terms are not translated correctly.

design of particular

  • Thread starter Thread starter tao9
  • Start date Start date
because the design consists of two only views, one above the other, the one above can only be the prospectus (view in front), although dissected; that below is the view in the plant (view from above) with all concentric circles.
We must remember that the fundamental views are three: prospectus, plant and profile. or if you prefer: front view, view from above and side view.
all the others are added to these two or three fundamentals, when these are not enough to highlight all the details
I think you're taking a gabola... the iso 5456-2 establishes the nomenclature of the views but not "battle" of imperio the main view. I decide which is the view in front, the side and the one from above, according to the visualization strategy that I intend to adopt to make the design as clear and readable as possible and also to optimize the space available to the sheet.
In any case, given the level from which the student leaves, do you not think that your observation, even if it was right (but it is not), is the last of the problems he has to face?
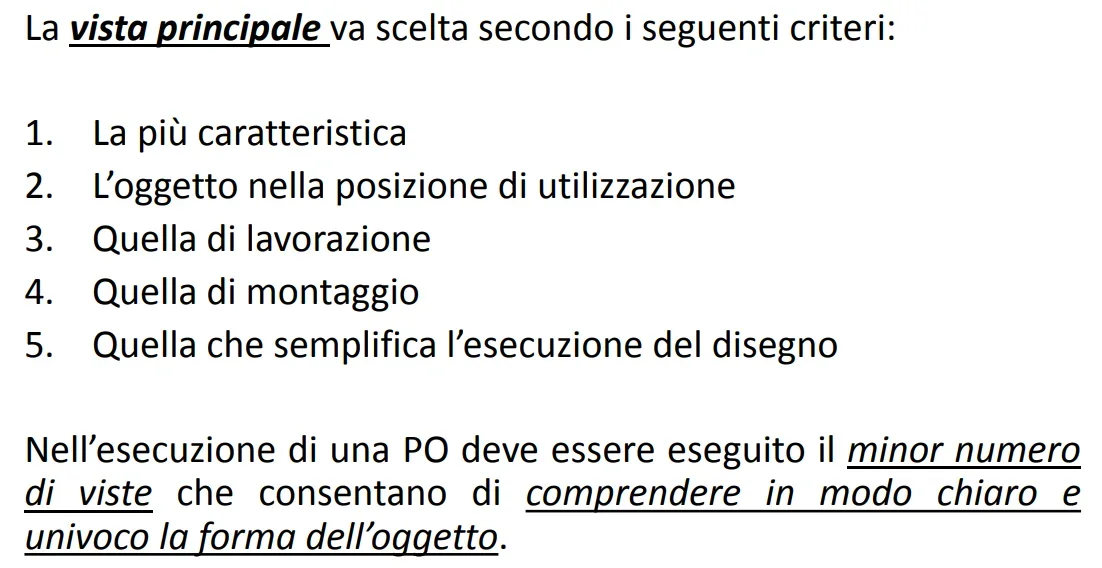
On the other hand, it is the first of the problems that a beginner has to face, put in the right way the views, so that anyone in Europe can read it without misunderstanding and the student can learn it forever.
 
On the other hand, it is the first of the problems that a beginner has to face, put in the right way the views, so that anyone in Europe can read it without misunderstanding and the student can learn it forever.
I think you're just... in more than 40 years of technical office where I overturned the views anywhere in space, I never received comments like yours.
this is the extract of a slide for a university course of technical drawing; as you see there is no default main view and you do not mention what you support.
If you still want to support what you claim, I'd beg you to bring back the extract of the norm.
1725900080016.webp
 
These five points are exactly what my two proposed views express.
I do not want to make comments, neither to you nor to anyone else, I only place my thought given by my study, but without claiming that it is shared.
different opinions then enrich and alert to avoid errors.
 
I added two quotas above (the diameter of the circumference of the holes and I forgot another diameter). Perhaps the cone below should be quoted as such and not as bevelous. the prof also wants to insert some tolerance of mating, geometric and roughness. I thought of inserting a coupling tolerance on the two h7 holes (it looks like the most generic one). same speech for geometric ones I have considered coaxiality always on the two holes, on the big one in reference to the smaller one. for roughness I thought it would make more sense to do a control where it mates rather than on an external surface. I put it all in a bit by taking inspiration from the various examples on the slides, but I did not understand much and I am not able to understand which element is more important than another.
 

Attachments

I added two quotas above (the diameter of the circumference of the holes and I forgot another diameter). Perhaps the cone below should be quoted as such and not as bevelous. the prof also wants to insert some tolerance of mating, geometric and roughness. I thought of inserting a coupling tolerance on the two h7 holes (it looks like the most generic one). same speech for geometric ones I have considered coaxiality always on the two holes, on the big one in reference to the smaller one. for roughness I thought it would make more sense to do a control where it mates rather than on an external surface. I put it all in a bit by taking inspiration from the various examples on the slides, but I did not understand much and I am not able to understand which element is more important than another.
Bye. If you ask for advice and these are given to you, why don't you fix the design?
You didn't reverse the arrows of the section. the quotation of the depths of the internal cavities is totally wrong. two more diameters are missing.
the cone, as you call it, is a bevel and you can quote it with its depth for the inclination (e.g. 1x45°).
for dimensional/geometrical tolerances and roughness, they depend on the coupling with other parts, which from what I understand, you do not know; or the prof gives you these info, or you have the license to put them a little as you want, just as an educational exercise.
 
Hi, excuse me, the other time I saw you were discussing this and so in doubt I left that aspect suspended. You told me before you realized what all the odds were and I changed accordingly. I can't understand what they're missing sincerely. for tolerances and the rest you are right, I know absolutely nothing and there is no need to reiterate my gaps if I am the first to state them. I have already explained that I do not have the material time to devote to this matter, but I am still looking for how much I can study it and apply it (with little results) to the design. I thank you for the advice but I do not know how to proceed
 
Hi, excuse me, the other time I saw you were discussing this and so in doubt I left that aspect suspended. You told me before you realized what all the odds were and I changed accordingly. I can't understand what they're missing sincerely. for tolerances and the rest you are right, I know absolutely nothing and there is no need to reiterate my gaps if I am the first to state them. I have already explained that I do not have the material time to devote to this matter, but I am still looking for how much I can study it and apply it (with little results) to the design. I thank you for the advice but I do not know how to proceed
two diameters are missing (while you have quoted it twice!). Put yourself there and check well, thinking you have to build that piece.
then the depths/sprays cannot be quoted as you did; the quotas you have put cannot give the measures nor to those who have to build the piece and not to those who have to control it with the measuring instruments, if not making calculations (what to avoid absolutely). Then I realize that you're doing management engineering and that if it's okay, you're doing the science, so you have no idea how to get this piece back and there's that you can't walk around. I don't know what to say. I have no idea what your professors claim you can do... Maybe you could just do what you did... but as I think it's not enough, at this point, you look for someone who gives you a hand in the presence; in 3/4 hours you should receive enough notions to pass the exam and forget this " nightmare". continue here makes you waste more time.. .
 

Forum statistics

Threads
44,997
Messages
339,767
Members
4
Latest member
ibt

Members online

No members online now.
Back
Top