Liotro
Guest
Good evening to all,
I'm creating a model that comes from rhino in solidworks trying to parameterize it.
the rhino model was made in 4 bodies that are subsequently merged to create a single body, so I thought to recreate the same strategy in solidworks using 4 lofts and then use the matching command, what do you think of this strategy? Do you think it is correct to proceed like this? or would it be more correct to create a single body and proceed with a sweep/loft cut to recreate geometry?
what strategy would you have adopted?

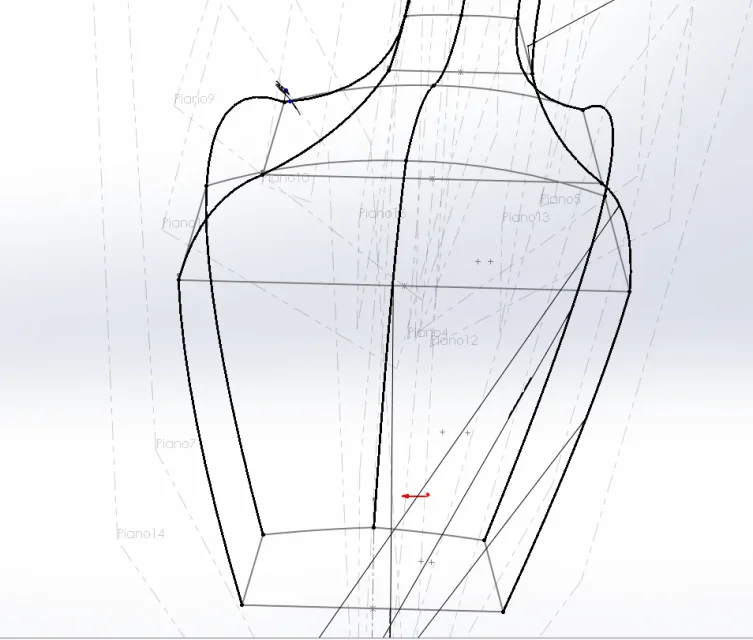
 I used the first strategy and creating sketches on the sections of the 4 bodies, which I carried out on several parallel and translated planes of a certain distance by copying the profile of the original body.
to recreate the bodies I used the loft command and used 3d sketch to create guidelines
(the body is complex and I had to use arches that I created on the floors that pass for 3 points of the consecutive sections inside the 3d sketch, not wanting to use the spline specially).
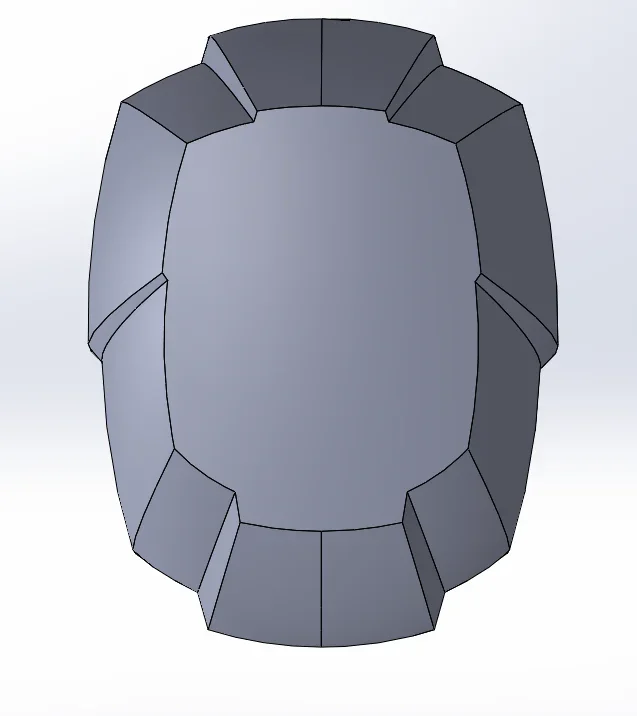
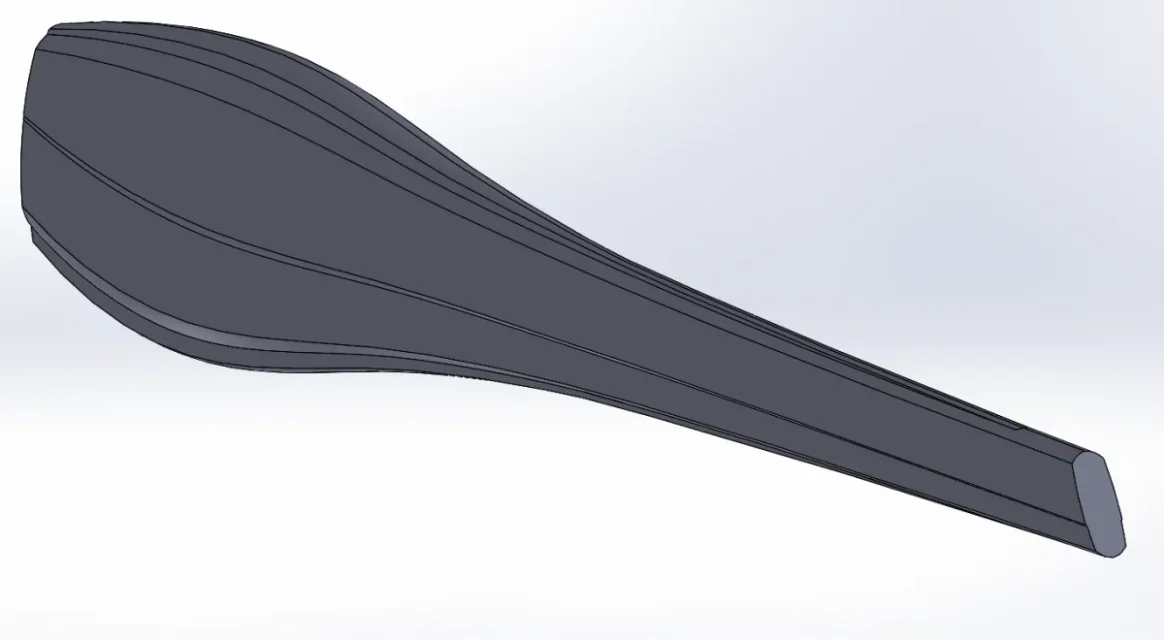
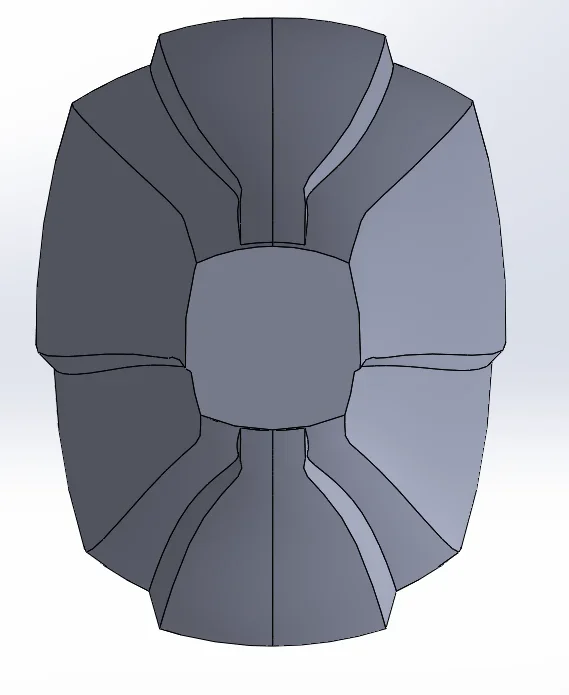
the result however is not satisfactory since the body is not perfectly clean but seems to be "indented"")
I am in front of this problem and I wanted to ask you some advice or point of reflection to reproduce the body in a "clean" way:
1) the problem of the guidelines on the loft comes from the fact that the arches used to connect the sketches of the consecutive sections, lie on non-complanar planes, therefore I cannot make the arcs between them tangents in the intersection point. so I would ask you if you know a way to use this method by inserting the tangences on the curves correctly (as it is not possible to follow the desired profile and create a single plan for the profiles)


 2) I tried to remake the guidelines with the command always spline on 3d sketch and the result is definitely better, only that I can not parameterize them in a unique way, how do you bind the spline within 3d sketch?
3) surely method 1 is the most complex and even longer, you when you find yourself in these situations as agite? Would you give me some advice? (I also tried to make guidelines only on the main planes and making plans tilted by the origin of the system not getting the desired result)
Thank you in advance for your time
I'm creating a model that comes from rhino in solidworks trying to parameterize it.
the rhino model was made in 4 bodies that are subsequently merged to create a single body, so I thought to recreate the same strategy in solidworks using 4 lofts and then use the matching command, what do you think of this strategy? Do you think it is correct to proceed like this? or would it be more correct to create a single body and proceed with a sweep/loft cut to recreate geometry?
what strategy would you have adopted?
I used the first strategy and creating sketches on the sections of the 4 bodies, which I carried out on several parallel and translated planes of a certain distance by copying the profile of the original body.to recreate the bodies I used the loft command and used 3d sketch to create guidelines
(the body is complex and I had to use arches that I created on the floors that pass for 3 points of the consecutive sections inside the 3d sketch, not wanting to use the spline specially).
the result however is not satisfactory since the body is not perfectly clean but seems to be "indented"
I am in front of this problem and I wanted to ask you some advice or point of reflection to reproduce the body in a "clean" way:
1) the problem of the guidelines on the loft comes from the fact that the arches used to connect the sketches of the consecutive sections, lie on non-complanar planes, therefore I cannot make the arcs between them tangents in the intersection point. so I would ask you if you know a way to use this method by inserting the tangences on the curves correctly (as it is not possible to follow the desired profile and create a single plan for the profiles)
2) I tried to remake the guidelines with the command always spline on 3d sketch and the result is definitely better, only that I can not parameterize them in a unique way, how do you bind the spline within 3d sketch?3) surely method 1 is the most complex and even longer, you when you find yourself in these situations as agite? Would you give me some advice? (I also tried to make guidelines only on the main planes and making plans tilted by the origin of the system not getting the desired result)
Thank you in advance for your time