

Join the forum for Designers!
Your expertise is vital to the community. Join us and contribute your knowledge!
Join the Forum NowShare, learn and grow with the best professionals in the industry.
We’re very excited to be bringing you the second video in our brand-new series for NX™ software. Throughout the year, we will be bringing you a variety of videos focusing on a complete end-to-end workflow. We will take you through steps that you’ll need to take, and best practices we’d recommend you implement into your workflow.
In the videos for this entry we will explore the steps that go into handling an assembly in NX for the first time, and actually beginning to build it.
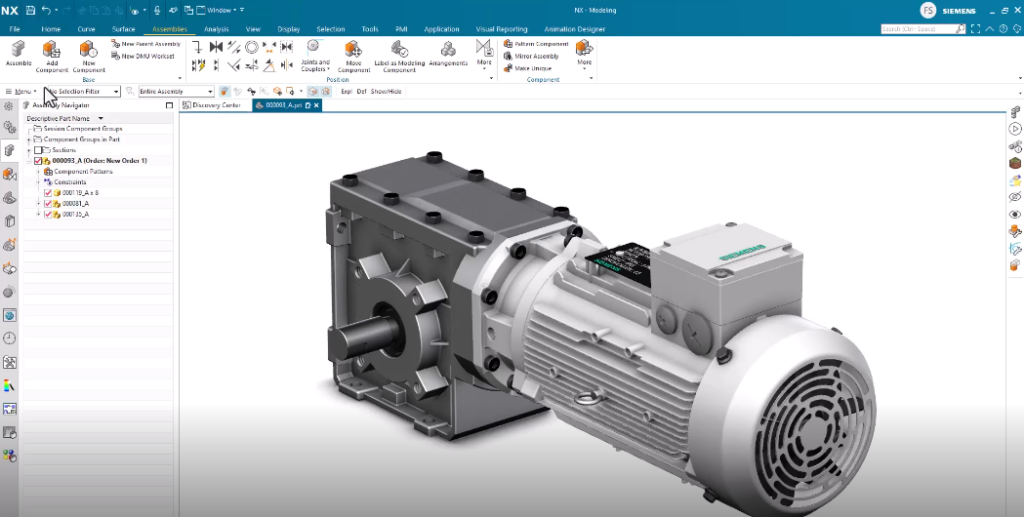
Throughout the course of this how to blog, we’ll be focusing on this gear motor assembly. We’ll show best practices to create a gearbox cover using a range of tools within NX and we will be introducing you to the preferences interface of the assembly application.
Creating an assembly
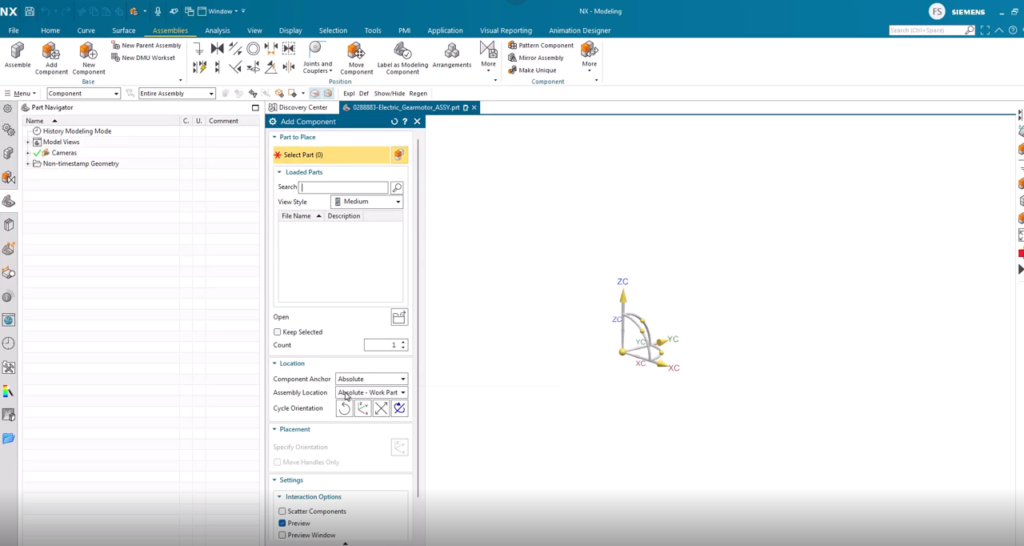
To begin with, make sure to select the assembly template part, as this contains specific settings optimized for assemblies. We would recommend creating a specific folder where you want the part saved, as this helps to keep your work organized. Here you might see that the assembly tool is suggested automatically during this operation, but as we really want the first part added to be located and positioned in the assembly, you can close this. Let’s instead now open the ‘add component’ tool. To select the part you want to add as a component to the assembly, you go to your project folder containing the specific part. In this example, the angle gearbox housing is the essential part here, and this will be the first part to add. To note here, ensure that your part is added in the absolute position, as this guarantees no accidental rotations are included.
However, let’s say that the absolute origin of the part does not align with what you consider to be the correct region, you can move this by first toggling the move handle only and move only the positioning coordinate system to align with the center. After this, you can turn the move handle only off, and set the coordinates to match the origin. Once confirmed, you will receive an option to add a constraint that will fix the part to its current position in the assembly. Though in our example, we choose not to add the fixed constraint.
Adding additional components
Time to add the next component. As we’ve already added the project folder to the resource bar, we can now very quickly navigate to the part we want to add to the assembly as a component. This procedure immediately suggests the ‘auto align’ option, and we can directly start selecting the geometry pairs from the two components that we want to constrain relative to each other.
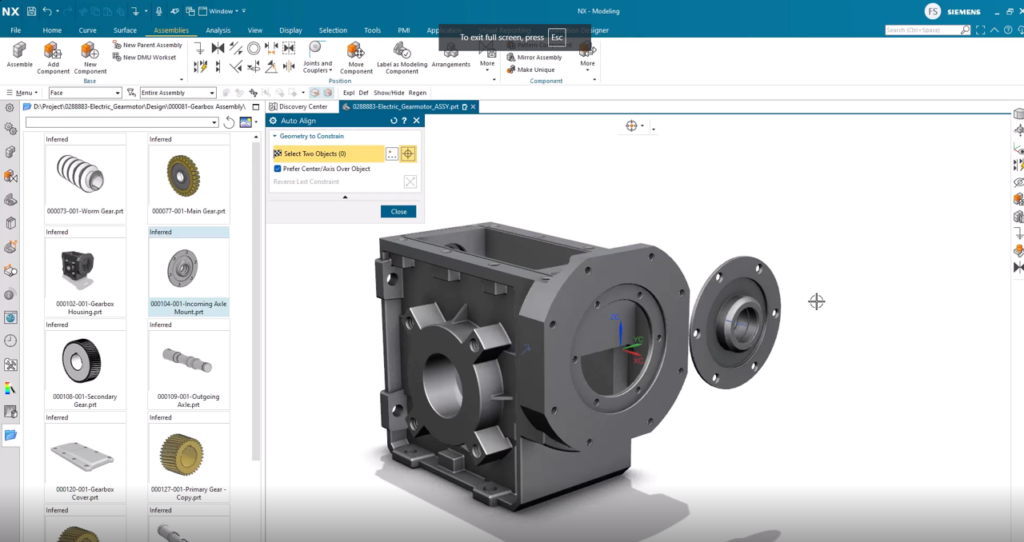
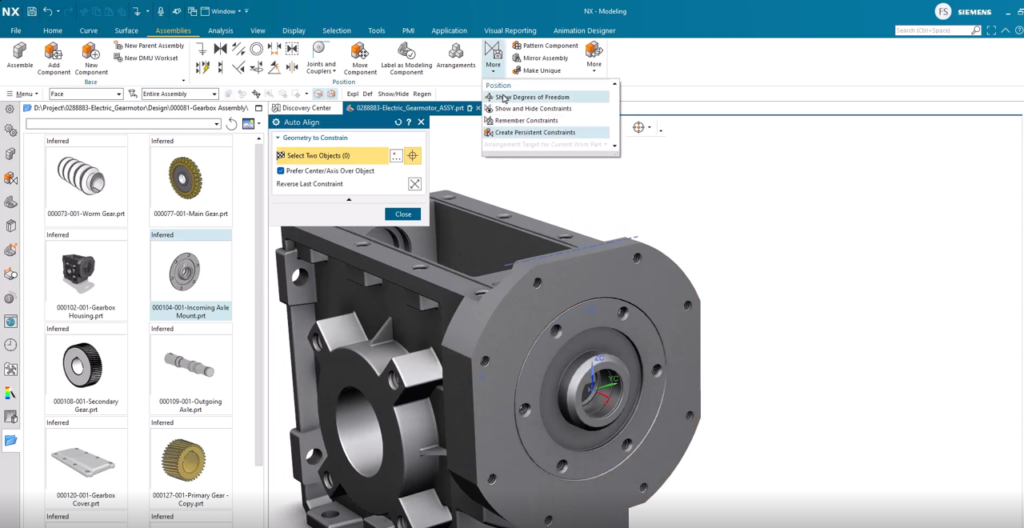
Looking at our example, as the aligned constraint is fulfilled by the constraints, the component moves to the aligned position. We now tell the system to align the inner flat face of the incoming axle mount to the outer flat face of the gearbox housing. The component is then moved to its updated, aligned position. Once at this stage, you’re easily able to check if a component is free to move in any way, also known as ‘the degree of freedom’ tool. To do this, you hover over the component we want to check, press and hold the left mouse button and move the mouse to see what moves.
Degree of Freedom
Let’s look a bit more into utilizing the degree of freedom. To check a component, NX makes it simple that you only need to select the component and look for the degree of freedom symbol. Note that the symbol is temporary and goes away with a refresh of the screen. The general rule of thumb is to fully constrain components, you still need to constrain the final degree of freedom.
To do this you need to utilize the auto-align tool to check the correct position of your component.. The component should then automatically reposition itself to comply with all the constraints that you previously applied to it. To double check this, open the degree of freedom and select the component – notice that no degree of freedom symbol shows up. Your component is now fully positionally constrained and you can no longer accidentally move it. You can also validate the position by checking the position column in the assembly navigator.
Adding a Standard part
So now that we are familiar with adding a component from a known library, we also want to have a look on how to add what is defined as a standard part. In the reuse library and the sub library, you can find the part that you need. Note that if your library is packed with parts, you can do a search at the top of the reuse library tab. Once you have located the necessary part, in our instance, a ball bearing, just drag and drop it into the graphical window.
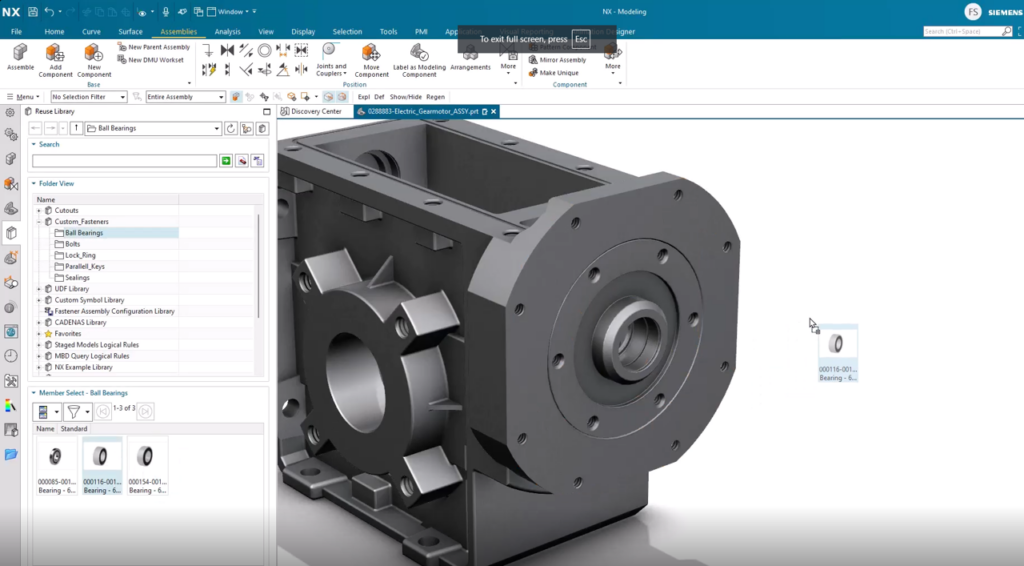
Once added, you will immediately be presented with the auto align tool, where the system will align to your requirements. Checking the position status of the ball bearing component we just added in the Assembly Navigator shows that it is only partial positioned. Again, checking with the degrees of freedom tool, this reveals that the component can rotate around its own axis.
Top Tip: When it comes to cylindrical shaped parts like ball bearings or bolts, there is no need to lock the rotation as this is not really adding value to the assembly, and it can therefore be accepted to be only partially positioned. At this stage, depending on your view settings, it can be difficult to see the symbol from the show degrees of freedom. You can switch the emphasis setting, select ‘see through all’, and things will be much clearer.
Creating a copy of a component
With our model, as the gearbox is filled with oil, we need to add a radial seal. This is a standard part which again can be found in the standard port library. To keep the radial seal in place, we need to add another retainer ring. One option here would be to add it from the reuse library, but as it is already in the assembly, NX allows you to copy this. You need to select the component that you want to copy and chose the move component tool. You then toggle the copy option on and drag the component to a new place using the positional drag handles. This alone will create a copy of the component, but it needs to be positioned with constraints. If you would like to reuse the constraints that you have already created, you can simply do a copy and paste operation.
Continue your journey with NX
Join the forum for Designers!
Your expertise is vital to the community. Join us and contribute your knowledge!
Join the Forum NowShare, learn and grow with the best professionals in the industry.