Join the forum for Designers!
Your expertise is vital to the community. Join us and contribute your knowledge!
Join the Forum NowShare, learn and grow with the best professionals in the industry.
By Jimmy Costello
Our latest NX™ software Tips and Tricks video demonstrates what Template Parts are, why you should use them, and how they can improve your workflows.
Predefined start parts that contain prerequisites and specific part settings saves valuable time downstream. Watch the video below to see how Template Parts in NX can elevate your design process.
Getting started
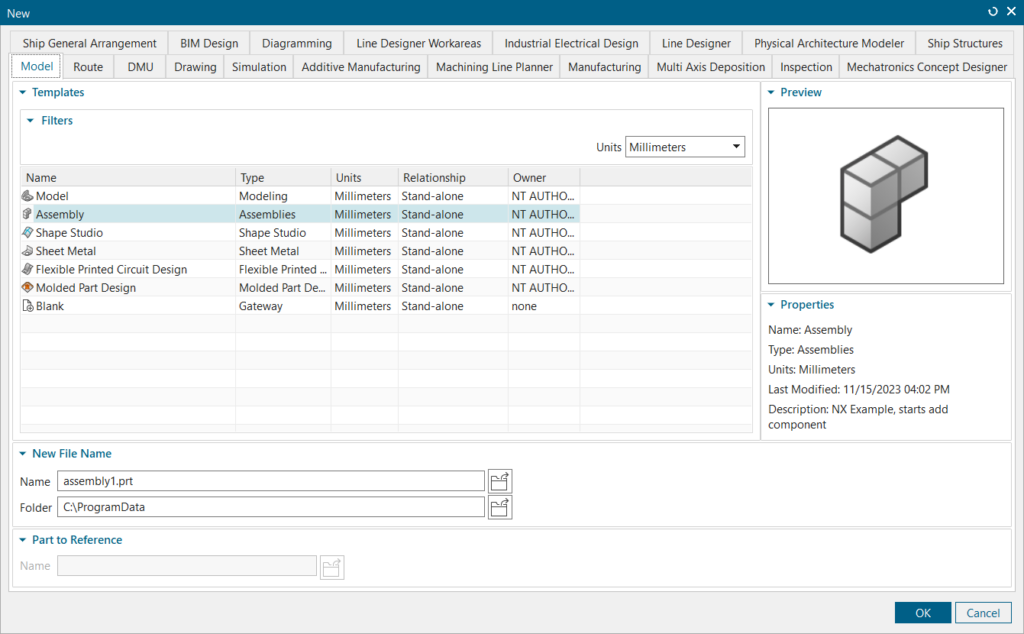
When starting new projects, you typically select the File tab and then New. After that, its easy to just hit Okay, and start your work in the part using the default settings without any further thoughts. However, it is important to pay attention to the different options and settings in your next pass through to ensure that your part is optimally setup for the discipline and type of work intended.

The first thing to pay attention to when beginning is the discipline you will be designing under. Each of these categories at the top contains template parts to speed up the process of starting new projects. To find information on each part we can look to the right-side of the window under Properties where we can find any additional information we may need for each Template Part.
What are Template Parts
Template Parts are start parts that contain prerequisites and specific part settings for optimized handling and use of data. Each template is developed to provide the most important tools and commands for the discipline they represent. These parts are available out of the box for general use that fits most customers, although they can still be tailored to meet company-specific requirements.
The behavior and appearance of a design part with 3D data may vary from how it behaves in an assembly or drawing part. These settings are optimized for each discipline’s Template Parts and have been developed and refined over time by the NX team using valuable input from the community.
When beginning a new project, it is important to select a template that closely fits your design needs. By doing this, valuable time is saved on simple house-keeping tasks that go into each part and assembly that you create.
Specific settings to look at
In addition to choosing the appropriate template part, there are a few more important settings to consider when starting a new project. Two important ones to pay attention to are units and referenced parts.
The units drop-down option is self-explanatory. Here, we select if we are going to be designing using metric or imperial systems, and this will set the default units for our designs and models.
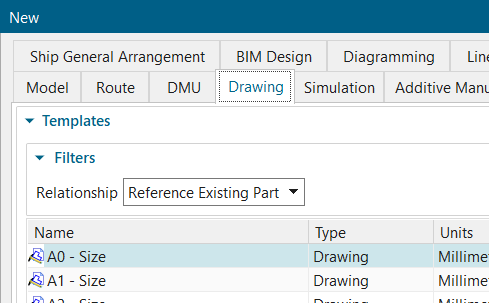
Another crucial setting to highlight is the Relationship tab located on the right. Here, we can choose whether any existing parts are referenced in our new template part. NX employs the Master Modeling Concept, where the design part containing the geometric 3D definition serves as the master design definition or single source of truth.

This means that other disciplines associatively link to the master model. These references or links to the master are automatically generated when the reference option is active. Making this selection is a significant step for templates such as drawing, simulation, and manufacturing. For parts that do not utilize relationships, this drop-down menu will not be available.
What’s next
After selecting our new template part, we are ready to begin designing. We now have all essential commands readily available, and important settings are properly selected. If we’re working across multiple disciplines simultaneously, NX will automatically adapt the toolset for the specific discipline when we switch work parts. When we’re ready to switch gears to another project, jumping back to a new template part is the perfect way to hit the ground running again.
Join the forum for Designers!
Your expertise is vital to the community. Join us and contribute your knowledge!
Join the Forum NowShare, learn and grow with the best professionals in the industry.

